Save this hiking packing list guide for later on Pinterest!
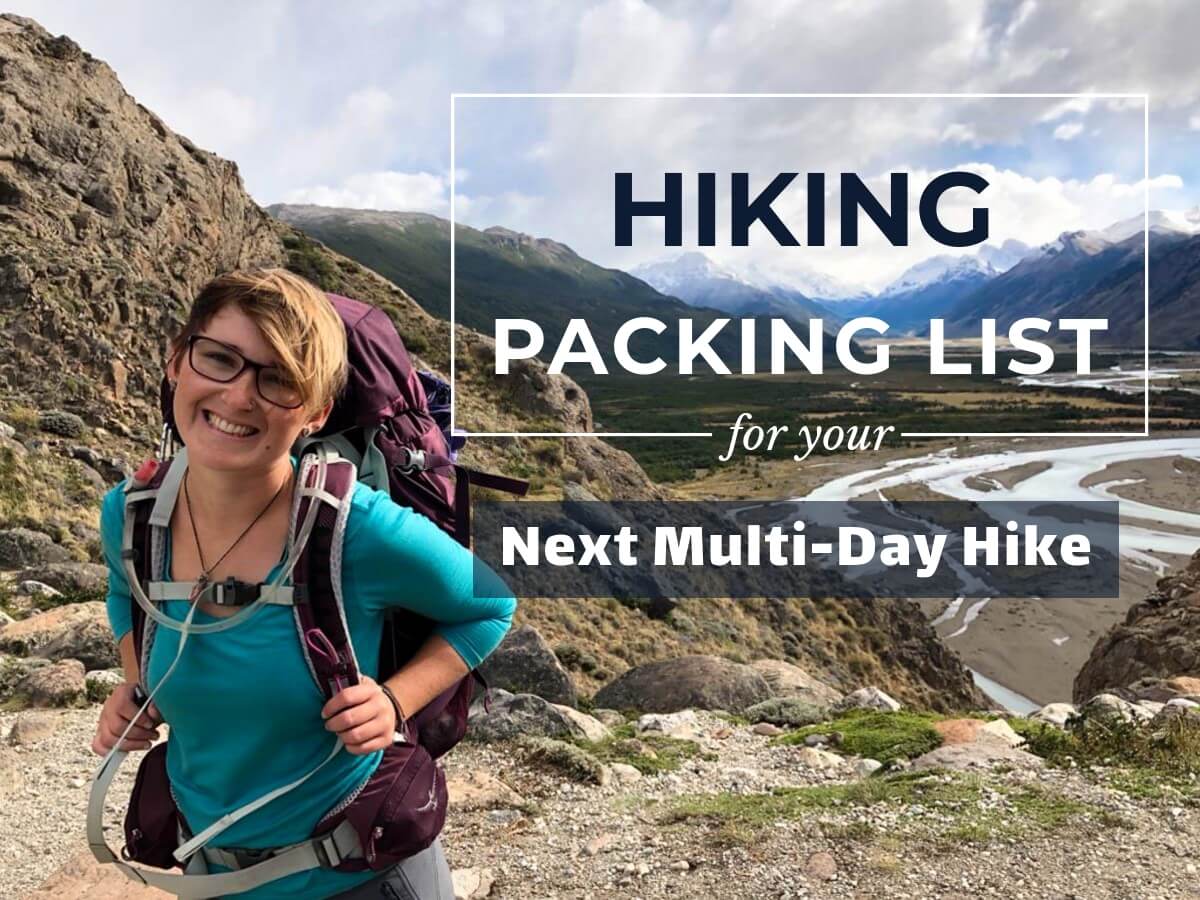
This hiking packing list will allow you to pack for your next multi-day trek easily and without stress or guess work. Whether you are a complete newbie to the hiking world, a regular day-hiker who wants to increase the intensity of their hobby, or a seasoned hiker looking for ways to improve their packing you should find this hiking packing list useful.
Why Trust This List
Packing the perfect amount of hiking clothing, trekking gear, food and safety equipment can be a complex endeavour. It takes time and a lot of trial and error to figure out what works best for you. This hiking packing list means you don’t have to go through the trial and error that I did to perfect your packing.
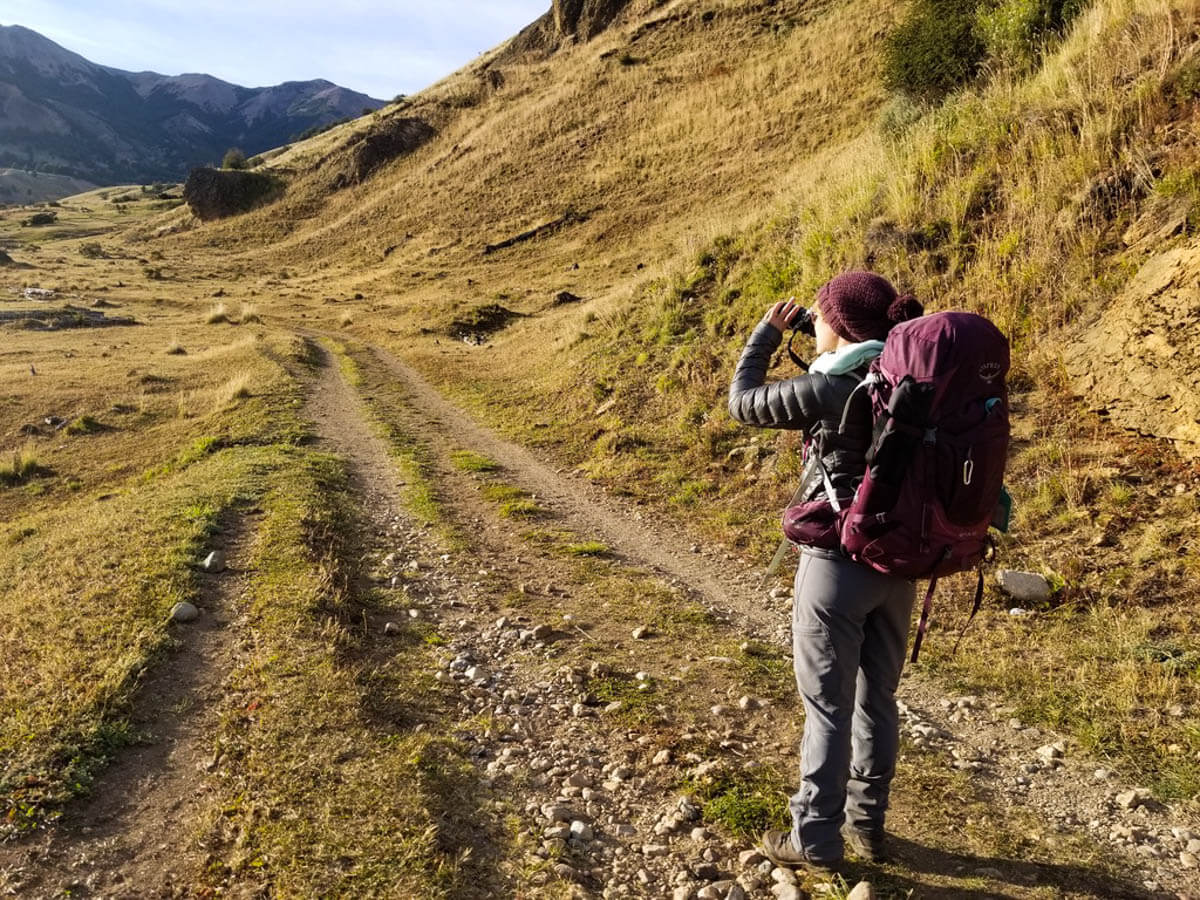
My very first overnight hike in Patagonia taught me a lot of lessons and I have continued to tweak and fine tune my packing list with every hike I have done since in a variety of locations across the globe with my Osprey Sirrus 50L![]() pack.
pack.
The Hiking Packing List

There’s something to the simplicity of trekking that really draws you in.
When it comes to trekking off into the wilderness with all you need on your back there are really only four necessities to include in a hiking packing list.
- Clothing to keep you warm, dry or at least as comfortable as possible.
- Shelter to keep you safe and out of harms way during those sometimes tumultuous nights.
- Food and water to help keep your body performing at peak capacity to get you where you need to go for those life changing adventures.
- Safety equipment in the event something awful or unforeseen happens, or to prevent said event from occurring altogether.
The last thing you will always need is something to put all of these items into; a trekking specific backpack. Deciding on a backpack really deserves it’s own post, so I won’t go into detail about that here in this hiking packing list.
For a quick glance look at what you should pack on your next adventure, look no further than the below checklist (available in a printable PDF copy here). For a more detailed look at what you should take and why, keep on reading through the full breakdown.

Save this useful checklist for later!
1. Clothing
There is a trick to packing light while still packing all of the necessities when it comes to hiking clothes. I’ll reveal my tricks of the trade here in my hiking packing list. The first trick is layering. This will prepare you for all weather conditions without you needing to double up on clothing. The second is to pack one set of clothes to hike in and one set to sleep in. You need to ensure you always keep the sleeping set dry.
Carrying extra changes of clothes to hike in is just a waste of space and weight. The minute you change into that fresh top or pants they will get just as dirty and sweaty as your other ones. There is really no point bringing them. Trust me.
The following clothes are what I believe you should pack to minimise weight and space, while ensuring you are still well prepared and protected. I’ve also noted the brands and items I used whilst in Patagonia. I’ve made recommendations of when they are suitable and alternative suggestions where they could have performed better.
Hiking Clothes

There is no better feeling than heading off into the wilderness with everything you need on your back!
Hiking pants –
I wore my Kathmandu XT Verso Softshell hiking pants![]() constantly. They are designed for cooler climates and combat water and the cold very well. This was perfect for Patagonia, as most days are on the cooler sides and the wind chill factor can be pretty icey. They also wick moisture from the body as well. This allows them to be breathable and wearable in slightly warmer climates also. The pockets are extremely handy and the bottom of the legs cinch in for snow.
constantly. They are designed for cooler climates and combat water and the cold very well. This was perfect for Patagonia, as most days are on the cooler sides and the wind chill factor can be pretty icey. They also wick moisture from the body as well. This allows them to be breathable and wearable in slightly warmer climates also. The pockets are extremely handy and the bottom of the legs cinch in for snow.
If you would prefer something a bit sleeker then you can opt for wearing leggings![]() or tights
or tights![]() instead. I would suggest wearing a slightly thicker pair if you are headed into colder climates, or even fleece lined leggings
instead. I would suggest wearing a slightly thicker pair if you are headed into colder climates, or even fleece lined leggings![]()
![]() if you are going to be somewhere that is extremely cold.
if you are going to be somewhere that is extremely cold.
At the end of the day, the trick is to wear what you are comfortable in and what is the most flexible for the climate you will be hiking in.
Hiking top –
One merino long or short sleeve top. I have worn the long sleeve Kathmandu merino![]() hiking top on all of my multi-day hikes in the last two years and it’s still going strong. I am in the process of purchasing a short sleeve Icebreaker merino
hiking top on all of my multi-day hikes in the last two years and it’s still going strong. I am in the process of purchasing a short sleeve Icebreaker merino![]() top as well. You get so many more wears from Merino than any other fabric due to it’s unique moisture wicking and anti-microbial properties. It also regulates your body heat allowing you to wear it in both cold and hot climates.
top as well. You get so many more wears from Merino than any other fabric due to it’s unique moisture wicking and anti-microbial properties. It also regulates your body heat allowing you to wear it in both cold and hot climates.
Fleece mid-layer –
The latest edition to my hiking clothes setup has been an Arc’teryx fleece![]() as my mid layer. It was one of the best decisions I ever made, and although expensive, was worth every cent! It is so comfortable, warm, and breathable with all of the technical features you would expect and want from a mid-layer. It is also quite stylish so I can get away with wearing it while travelling, while doing other fitness actives and while around town in outdoorsy places.
as my mid layer. It was one of the best decisions I ever made, and although expensive, was worth every cent! It is so comfortable, warm, and breathable with all of the technical features you would expect and want from a mid-layer. It is also quite stylish so I can get away with wearing it while travelling, while doing other fitness actives and while around town in outdoorsy places.
When choosing a fleece, there are so many different types, designs, and consistencies and weights. Pick whichever suits your layering system and comfort most. My only suggestion — don’t buy a soft-shell fleece if you are planning on using it as a mid-layer with other jackets as it won’t sit comfortably and you will just be adding weight and bulk for no reason.
Down jacket –
I highly recommend the Kathmandu XT range for maximum warmth, minimum weight and their unique pack and go abilities. I took the XT Ultralight Packable Down Jacket![]() to Patagonia with me and wore it constantly while trekking and travelling. There were so many features I loved about this jacket, but the main highlights for me were the unique warmth to weight ratio which allowed it to be very warm while also being very light and slim fitting.
to Patagonia with me and wore it constantly while trekking and travelling. There were so many features I loved about this jacket, but the main highlights for me were the unique warmth to weight ratio which allowed it to be very warm while also being very light and slim fitting.
The down is treated and the outer layer of the jacket is also water repellent. This is very handy when you are out in the wilderness in a variety of weather conditions. The ability to stuff the jacket into it’s own pocket and zip it away was also perfect while on the trail and while in transit off the trail.
Wind and water proof outer shell –
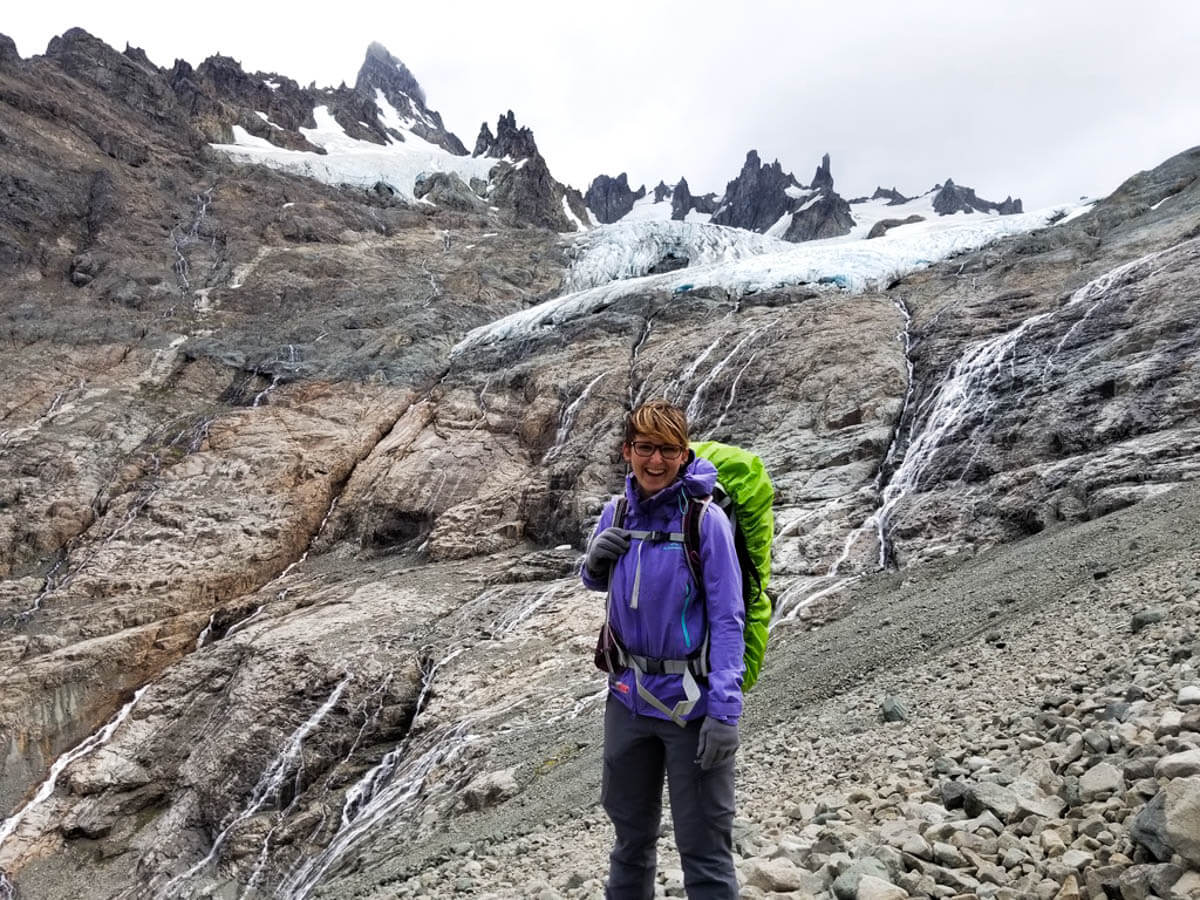
I took my purpose Kathmandu wind and waterproof jacket with me to Patagonia and New Zealand. It withstood everything the wind and rain could throw at me, even after four hours of torrential rain during one hike. Unfortunately they don’t make that particular one anymore. I think if I had to buy a new one I would probably look at this jacket from Arc’teryx![]() due to the exceptional make and materials, or a jacket from The North Face
due to the exceptional make and materials, or a jacket from The North Face![]() if you are after something a little cheaper. There are a lot of options so just make sure you match it to the types of conditions you will need it for.
if you are after something a little cheaper. There are a lot of options so just make sure you match it to the types of conditions you will need it for.
2 x merino hiking socks –
I have found that most brands of merino socks![]() are pretty similar as long as you are buying genuine merino. As with the merino tops, merino socks enables you to wear them more and wash them less. This means you can get away with packing less pairs for the trail. Cycling between two pairs works well. You can wear one and air the other out and then swap. I ended up washing one pair halfway through my ten day trek and then washed the other pair when the first pair dried.
are pretty similar as long as you are buying genuine merino. As with the merino tops, merino socks enables you to wear them more and wash them less. This means you can get away with packing less pairs for the trail. Cycling between two pairs works well. You can wear one and air the other out and then swap. I ended up washing one pair halfway through my ten day trek and then washed the other pair when the first pair dried.
Good quality, waterproof hiking boots –
I am absolutely obsessed and in love with my Mammut, high top, waterproof hiking boots. These are the new version of my hiking boots![]()
![]() that I bought three years ago. Mine are not full leather, because I wanted to be able to wear them in hot and humid Queensland as well as in alpine terrain. I think the next pair I buy will be full leather more like these ones.
that I bought three years ago. Mine are not full leather, because I wanted to be able to wear them in hot and humid Queensland as well as in alpine terrain. I think the next pair I buy will be full leather more like these ones.
After being worn on a hiking trip on the Great Ocean Road, three trips to New Zealand, six weeks of trekking in Patagonia, on The Overland Track in Tasmania, and a total of five months on the road in South America they are still in almost brand new condition. They faced complete immersion in mud and water, several blasting’s of dust and dirt, trudging through snow and just about everything else mother nature could throw at them and they took it with ease.
I often found myself looking down at my hiking buddies with a smile and feeling so grateful I had them with me. An added bonus was I never really had to “break them in” as they were comfortable and blister free from day one. This is a combination of their quality and design, and likely also their perfect fit to my feet. You need to buy the hiking boots that are right for you.
Sleeping Clothes
Thermals
I recommend always buying merino![]() when it comes to thermals. As previously mentioned you get more wear out of them and they are excellent at regulating body temperature. Make sure you take a full length top
when it comes to thermals. As previously mentioned you get more wear out of them and they are excellent at regulating body temperature. Make sure you take a full length top![]() and bottom
and bottom![]() for sleeping in.
for sleeping in.
Socks
Take an extra pair of merino socks![]() to sleep in that you always keep clean and dry. Buy a thicker pair if possible for colder temperatures.
to sleep in that you always keep clean and dry. Buy a thicker pair if possible for colder temperatures.
Camp Shoes
Taking a pair of hiking sandals![]() are a good idea for wearing around camp and for river crossings when hiking. The first thing you want to do after a long trek is to take your hiking boots off, but you still need something to keep your feet and any fresh socks clean. These ones
are a good idea for wearing around camp and for river crossings when hiking. The first thing you want to do after a long trek is to take your hiking boots off, but you still need something to keep your feet and any fresh socks clean. These ones![]()
![]() are the Teva’s I own which are currently on sale with free shipping on Amazon at the moment. Something similar to Crocs
are the Teva’s I own which are currently on sale with free shipping on Amazon at the moment. Something similar to Crocs![]()
![]() would work too if that’s more your style and you want something a little cheaper.
would work too if that’s more your style and you want something a little cheaper.
Accessories – Hiking & Sleeping

While colour coordination shouldn’t be your main priority, I had fun mixing and matching my colours.
Beanie –
Make sure your beanie or warm hat is fleece lined and a secure fit like these ones![]() so that the wind doesn’t get through and heat doesn’t escape. The one I’m wearing above is a Roxy fleece lined beanie
so that the wind doesn’t get through and heat doesn’t escape. The one I’m wearing above is a Roxy fleece lined beanie![]() and it actually only left my head twice during my entire 10 day trek on the O Circuit in Torres Del Paine.
and it actually only left my head twice during my entire 10 day trek on the O Circuit in Torres Del Paine.
Buff –
Thick or thin buff![]() depending on the climate. I actually bought mine in Patagonia, so it is a Chilean brand called Doite. I loved the thickness of my Doite one as it not only helped with the extreme winds but also combatted the cold as a scarf would without taking up any space when I wasn’t wearing it. One of the most popular brands here in Australia is Buff
depending on the climate. I actually bought mine in Patagonia, so it is a Chilean brand called Doite. I loved the thickness of my Doite one as it not only helped with the extreme winds but also combatted the cold as a scarf would without taking up any space when I wasn’t wearing it. One of the most popular brands here in Australia is Buff![]() . I would recommend to check out their options.
. I would recommend to check out their options.
Gloves –
You may need thin, thick or waterproof depending on the climate. I ended up with two pairs while in Patagonia and alternated between them depending on the hike. I would recommend a warm, fleece lined pair![]() that have a waterproof outer layer for somewhere like Patagonia in the shoulder season when it will get to pretty extreme temperatures overnight. A thinner pair
that have a waterproof outer layer for somewhere like Patagonia in the shoulder season when it will get to pretty extreme temperatures overnight. A thinner pair![]() that allows you to still operate your camera, phone or tent easily would be fine if you are hiking somewhere a little less cold that may still be quite windy.
that allows you to still operate your camera, phone or tent easily would be fine if you are hiking somewhere a little less cold that may still be quite windy.
2. Shelter

Top down, letting the sun shine in.
It is so important to ensure you have adequate shelter and sleeping gear for multi-day trekking. It needs to be catered towards the conditions you will be experiencing. You need to ensure you will stay warm and dry throughout the night. If your hiking destination is known for intense winds, extremely cold nights or various other extreme weather elements then you may need to invest more money into your sleeping gear to ensure you remain warm, safe and secure during your hike. These are all of the items I would include in a hiking packing list for adequate shelter.
Hiking tent –
I used the MSR Hubba NX Solo tent![]() tent while in Patagonian and it withstood the infamous winds and rain! It is extremely lightweight which helps to keep your overall pack weight down while also being really easy to setup and pack down. It packs down quite small too which means it can fit inside or outside your pack very easily. Friends of mine used a North Face tent
tent while in Patagonian and it withstood the infamous winds and rain! It is extremely lightweight which helps to keep your overall pack weight down while also being really easy to setup and pack down. It packs down quite small too which means it can fit inside or outside your pack very easily. Friends of mine used a North Face tent![]() (which is a little cheaper) and tents from the popular co-op REI
(which is a little cheaper) and tents from the popular co-op REI![]() ; however, I haven’t used them personally so it really depends on your preference.
; however, I haven’t used them personally so it really depends on your preference.
Tent footprint –
This is not always necessary but the matching MSR Footprint![]() for the Hubba Solo was tiny and lightweight and made such a difference in rocky locations.
for the Hubba Solo was tiny and lightweight and made such a difference in rocky locations.
Sleeping mat –
I used the Sea To Summit Ultralight Insulated Sleeping Mat![]() while in Patagonia. It was incredibly light, easy to set up and took up next to no space in my bag. I wish I had gone for something with a little more insulation for the colder climate though. My Sea to Summit would be perfect for treks where the temperatures stay above 0 degrees, with something more like a Thermarest for anything below freezing. The Thermarest range increase in ratings for warmth from the lighter version
while in Patagonia. It was incredibly light, easy to set up and took up next to no space in my bag. I wish I had gone for something with a little more insulation for the colder climate though. My Sea to Summit would be perfect for treks where the temperatures stay above 0 degrees, with something more like a Thermarest for anything below freezing. The Thermarest range increase in ratings for warmth from the lighter version![]() to the heavier and warmer version
to the heavier and warmer version![]() .
.
Sleeping bag –
I used the Sea To Summit Spark 3 SpIII Ultralight Down Sleeping Bag![]() while in Patagonia. It is extremely light and packs down very small in the compression sack. While it is only to degrees comfort though, so I would suggest something a little warmer like this Sea to Summit
while in Patagonia. It is extremely light and packs down very small in the compression sack. While it is only to degrees comfort though, so I would suggest something a little warmer like this Sea to Summit![]() bag for the colder climates or at high altitudes. It is definitely worth investing in light weight, warm treated down to save on space and weight. Even if it is more expensive your back and legs will thank you later when you are carrying something lighter.
bag for the colder climates or at high altitudes. It is definitely worth investing in light weight, warm treated down to save on space and weight. Even if it is more expensive your back and legs will thank you later when you are carrying something lighter.
Thermal sleeping bag liner –
I added the Sea to Summit Thermolite Extreme sleeping bag liner![]() to my sleeping setup for extra warmth and comfort. It took the chill out of the lining of my sleeping bag and gave me a few extra degrees of warmth. If you want even more warmth then you could try the fleece
to my sleeping setup for extra warmth and comfort. It took the chill out of the lining of my sleeping bag and gave me a few extra degrees of warmth. If you want even more warmth then you could try the fleece![]()
![]() version as well.
version as well.
Hiking pillow –
This is a luxury item that is not really necessary but an added comfort that might make it easier to get some much needed rest. I took the Sea To Summit Aeros Pillow![]() which was surprisingly comfortable with a soft material outer layer. It has quick pack up and let down and is smaller than the size of your palm when inside it’s carry bag.
which was surprisingly comfortable with a soft material outer layer. It has quick pack up and let down and is smaller than the size of your palm when inside it’s carry bag.
When the mountains call, you want to be ready.
3. Food
Well Planned Meals
Food is often where people go wrong when packing for a long trek. They often pack too many heavy items that don’t contain the right kind of energy they need to sustain themselves on long treks. My suggested meal plans are a basic guideline, which can be altered or added to depending on your tastes and needs. I always work out my portion sizes in advance so I don’t eat too much or too little of my supplies. These portion sizes will vary from person to person and it might take you a few shorter hikes to work that out.
Suggested Meal Plan
My suggested daily meal plan for your hiking packing list is as follows;
- Breakfast – Rolled quick-oats, dried fruit and nut, tea bag or coffee
- Lunch – Snacks throughout the day that contain high energy (e.g. protein bars, dried fruit and nut, chocolate bars, muesli bars etc)
- Dinner – Soup sachet (I prefer tomato), pasta (I found spiral cooked the quickest and was the easiest to pack), chorizo or other cured meat, cheese, tea bag
- Dessert – Chocolate or something else as a treat before bed and around camp if needed
If you aren’t a fan of pasta, or repetition then the pasta can be swapped out for rice or any other carbohydrate rich base. I find pasta is the easiest and quickest option. The soup sachet can be traded in for a variety of other powder based sauces to keep your meals interesting. Just make sure you don’t need to add milk to the base.
You can also pack fresh fruit and vegetables for the first few days on longer hikes. I note that I did not opt for this to save on weight and space, but a lot of experienced backpackers still do. At the end of my ten day trek, I had wished I had some vitamin full fruits and vegetables at some point on my trek. Just remember you need to pack out whatever you take with you. Taking tinned items with you only adds to the amount of rubbish you have to continue to carry.
Cooking Equipment
The next major area of importance when it comes to meals is what you cook your food with. I bought my cooking setup from Aldi and was surprised that after six weeks of constant use it is still in perfect working order. Depending on whether you are cooking for one person, two or a whole group then you may need to adjust the size of your cooker, cooking pots and gas canisters.
Gas Stove
I bought mine from Aldi and it worked a treat. If you are just starting out I wouldn’t recommend a Jetboil![]() , as they are pretty expensive. Something more basic like this one
, as they are pretty expensive. Something more basic like this one![]() would take up a lot less room and save you a few hundred dollars. The main benefit of the Jetboil is that it reduces the time it takes for the water to boil. This means you need to take less gas canisters on longer hikes. A basic gas stove was fine for me but I would look at a Jetboil for future if I was hiking with multiple people.
would take up a lot less room and save you a few hundred dollars. The main benefit of the Jetboil is that it reduces the time it takes for the water to boil. This means you need to take less gas canisters on longer hikes. A basic gas stove was fine for me but I would look at a Jetboil for future if I was hiking with multiple people.
Cooking Pots
You really only need a set of two; one big and one small. Mine came with my gas cooker and were designed so the gas canister could fit inside with one pot as the base and one as the lid. This was very handy whilst in transit. Make sure the pots have silicone coated handles as well so you don’t burn yourself or melt them. Something like this set![]() would work great. I used my big one for boiling water and cooking dinner and the little one doubled as my cup for drinking tea. Don’t take any other cooking pans, plates or cups. You don’t need them.
would work great. I used my big one for boiling water and cooking dinner and the little one doubled as my cup for drinking tea. Don’t take any other cooking pans, plates or cups. You don’t need them.
Gas Canister
Buy this on the road and as you need. Remember, you are not allowed take them on flights!
Spork
Just what it sounds like; a spoon and fork combined into one. Try to buy something metal or titanium![]() to be sturdy and light.
to be sturdy and light.
Multi-tool Army Knife
For cooking and just about everything else. This was a very important and well used item on the trails and I’m so glad my friend gifted it to me before I left. Something like this![]() would work perfectly.
would work perfectly.
Lighter and Matches
Lighter and matches – having multiple options to light your gas is important so you are never out of luck. Eating cold soup would just be depressing after a 10 hour hike.
Water Bottle or Bladder
The size of your water bladder or bottle will depend on the length of your hike. How often you will have access to water sources on the trail will also affect how many litres you want to carry at a time. If you go down the water bottle route I would suggest a Nalgene![]() as a lot of hikers love the sturdiness of these and their ability to also hold hot water. I personally prefer water bladders such as a Camelbak
as a lot of hikers love the sturdiness of these and their ability to also hold hot water. I personally prefer water bladders such as a Camelbak![]() or Osprey for ease of use when hiking. I wouldn’t recommend buying a cheaper brand as they almost always end up leaking.
or Osprey for ease of use when hiking. I wouldn’t recommend buying a cheaper brand as they almost always end up leaking.
Nothing Else!
You don’t need plates or cloths or any other weird cooking contraptions. It’s all just extra weight and detracts from your experience in the wild!!
4. Safety Equipment
Headlamp
Some people invest in really good quality headlamps, particularly if they do a lot of hikes in darkness for sunrise. If you are just starting out then something basic like this![]() should be fine to get your kit started. Don’t forget to take extra batteries! There are USB rechargeable
should be fine to get your kit started. Don’t forget to take extra batteries! There are USB rechargeable![]() versions available as well. These are only useful if you are taking some sort of power bank that can recharge it on longer hikes.
versions available as well. These are only useful if you are taking some sort of power bank that can recharge it on longer hikes.
First Aid Kit
You need to make sure it has the basics plus any other medical equipment or medications that apply to you and any unique conditions you have. I suggest putting this together yourself based on your needs.
Emergency Blanket
I didn’t need to use this Kathmandu Emergency Blanket![]() thankfully, but it was comforting to have in my pack just in case. It is definitely a must have for any alpine or high altitude hikes. They are really cheap and can be bought in packs like these
thankfully, but it was comforting to have in my pack just in case. It is definitely a must have for any alpine or high altitude hikes. They are really cheap and can be bought in packs like these![]() .
.
GPS / Safety Beacon
A GPS/safety beacon is useful if you will be trekking in an off-the-beaten-path location. I didn’t take one due to where we were hiking. I also knew I would never be the only person on the trail. There is also no search and rescue in Chile so a safety beacon would have been no use. If you are hiking on your own or in an area without reception or rangers on site then it is absolutely vital to carry at least a GPS system for navigation. And if there is search and rescue facilities then a safety beacon of some sort is useful.
Tent Repair Kit
A repair kit for your tent and tent poles is another thing I didn’t take but wish I had. I saw a lot of people using these and if your tent breaks on day 5 of a 10 day circuit, you are basically out of luck without one. Something simple like this![]() would have been fine.
would have been fine.
Water Filtration System
I use the Camelbak All Clear UV Filter water bottle![]() . A UV lamp is the most effective water treatment system available at present. This particular lamp only takes 60 seconds to purify your water by 99.9%. It works in the same way as a Steripen, but it screws onto your water bottle for ease of use. A water filtration system is also handy for all kinds of travel where the water isn’t completely safe to drink. It is rechargeable while lasting for weeks on end, meaning it basically pays for itself. It also saves the environment as you don’t need to purchase bottles of water constantly while on the road.
. A UV lamp is the most effective water treatment system available at present. This particular lamp only takes 60 seconds to purify your water by 99.9%. It works in the same way as a Steripen, but it screws onto your water bottle for ease of use. A water filtration system is also handy for all kinds of travel where the water isn’t completely safe to drink. It is rechargeable while lasting for weeks on end, meaning it basically pays for itself. It also saves the environment as you don’t need to purchase bottles of water constantly while on the road.
The backpack eventually becomes part of you…
Start Hiking
The final step to any good hiking packing list is to actually get out there and start hiking. You will probably be terrified and nervous before your first multi-day trek. Once you get out there though, all of that fear and uncertainty will melt away to reveal the beauty and magic of trekking. Being one with nature and the outdoors is a healing and rewarding experience.
To get you started, here are a few of my favourite hikes in Patagonia for you to add to your hiking bucket list;
- The Best Hikes in Bariloche
- Refugio Frey
- Hiking and Camping in Pumalin Park
- Hiking to the Hanging Glacier in Puyuhuapi
- The 4 Day Trek to Cerro Castillo
- The Best Hikes in El Chaltén
Don’t forget to download the hiking pack list checklist for easy reference when you pack for your next trip. And if you liked this guide then please save it for later on Pinterest!
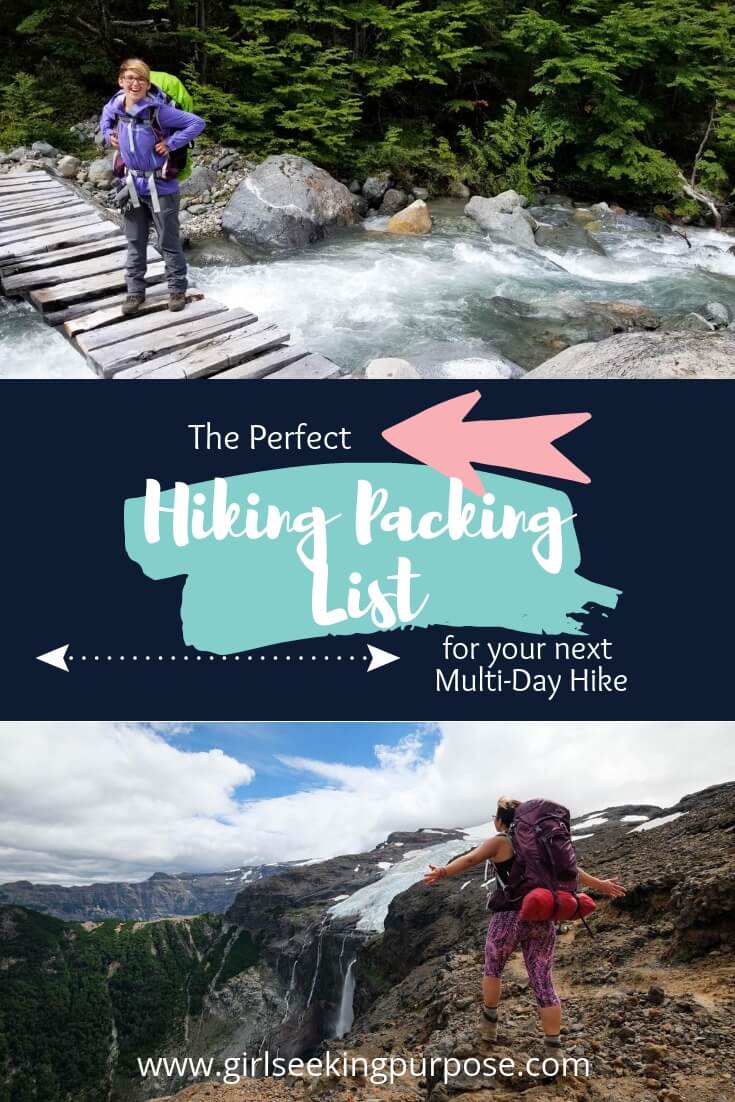
Save this hiking packing list for later on Pinterest!
-- Girl Seeking Purpose
This post contains affiliate links, which means that if you follow a link for a product or service and make a purchase, I receive a small payment at no extra cost to you. I only recommend products or services that I have used, trust and would honestly recommend to my readers. Building affiliate links into my site will help keep my blog going and continue to allow me to produce the content that I hope you are all enjoying reading.
Thanks for sharing an amazing presentation about hiking packing list. Next month I will take a vacation and make a hiking trip and I really think your post will help me to make a great trip.
Hi Doona,
Thanks for your lovely comment. I hope you find the post, and the downloadable checklist, useful when you pack for your hike next month. Enjoy your time in the outdoors! 🙂
Thanks,
Caitlyn