Save this guide about hiking The O Circuit in Patagonia for later on Pinterest!
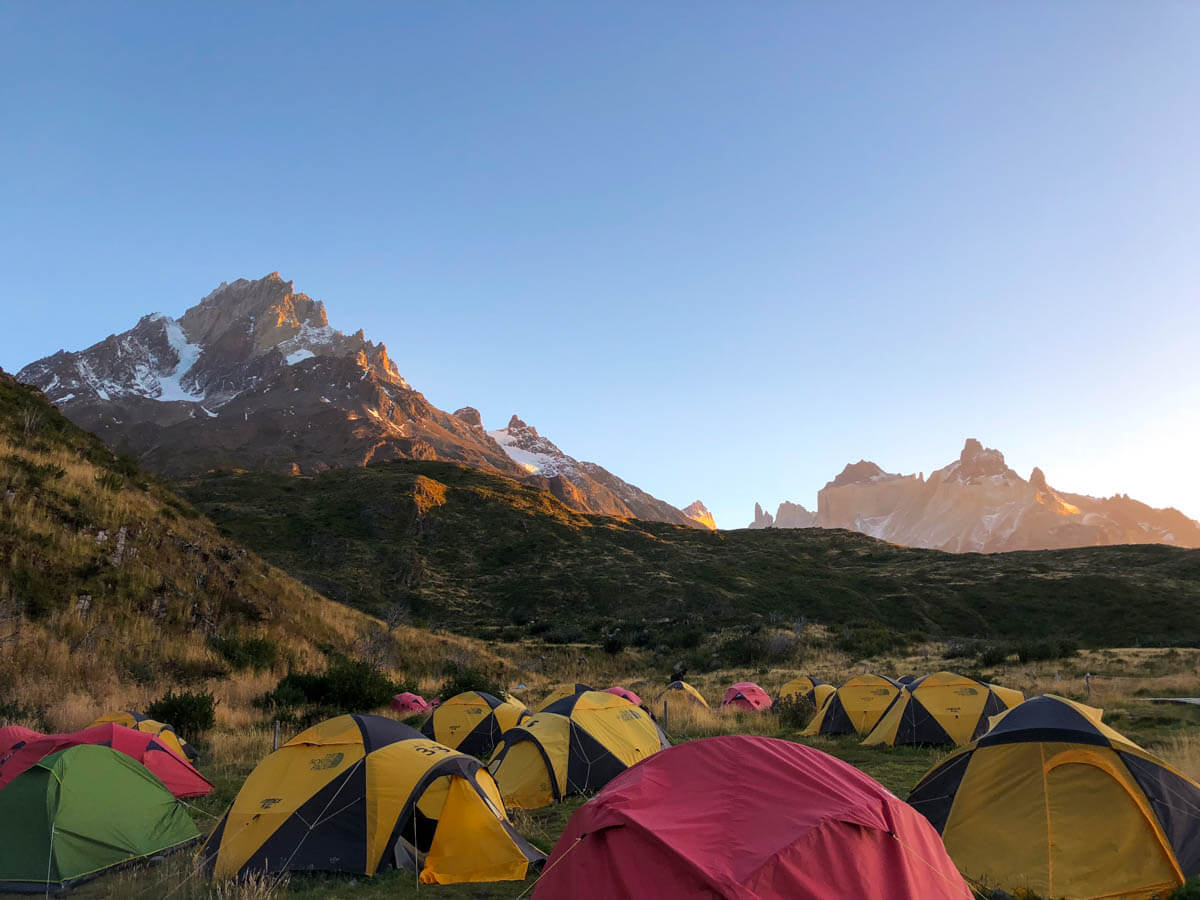
The O Circuit
For a lot of people, hiking the O Circuit in Patagonia is a life long dream. If you have spoken to anyone who has been to Patagonia, then you know it is infectious and life changing. The O Circuit is no exception. It is famous for both the incredible views and the extremely challenging and uncontrollable weather. Both of these are huge draw cards for outdoor enthusiasts and travellers alike.
The O Circuit is an excellent multi-day hike for anyone who knows the basics of trekking, but wants to expand their horizons and tackle one of the most beautiful trails in all of Patagonia, and arguably the world. The hard work of the O Circuit is well and truly rewarded by the endless views of glaciers, mountain passes and sweeping valleys.
The O circuit can be completed in 7 – 9 days depending on your fitness level, preferred hiking pace, and of course, the weather. This guide will provide you with everything you need to know to prepare for, and hike the O Circuit independently. The hiking times and distances are based on my own experiences so please always consider your own fitness level and ability.
One day will be sunshine, the next could be snow or rain. You never know on the O!
This post contains affiliate links, which means that if you follow a link for a product or service and make a purchase, I receive a small payment at no extra cost to you. I only recommend products or services that I have used, trust and would honestly recommend to my readers. Building affiliate links into my site will help keep my blog going and continue to allow me to produce the content that I hope you are all enjoying reading.
Safety Note
Experience Level
It is important to highlight that this is not a hike I would recommend to someone who has never completed an overnight hike before. If you plan to hike the O Circuit independently, having at least a basic level of experience in the outdoors and alpine terrain is recommended. You can find yourself caught in some fairly tumultuous weather where you will need to be prepared.
You will also be hiking in areas that are a little further off the tourist trail, with fewer to no amenities, for more than a week. If you want to complete the O Circuit independently then you will also need to take the appropriate shelter, cooking, clothing and safety gear and carry it all for the duration of your hike. A moderate level of fitness and experience hiking while carrying this kind of weight is therefore recommended.
It is Worth It
Don’t let all this scare you though. Before heading to Patagonia I had never completed an overnight hike. I started small and worked my way up over a six week period of trekking which culminated in the incredible experience that was, the O Circuit. It is quite amazing what humans can accomplish when we want to.
Here is everything you need to know before you head out onto the trail. For additional information about how to get to Puerto Natales and to and from the Torres Del Paine National Park, check out my Ultimate Guide to Torres Del Paine.
When to Go
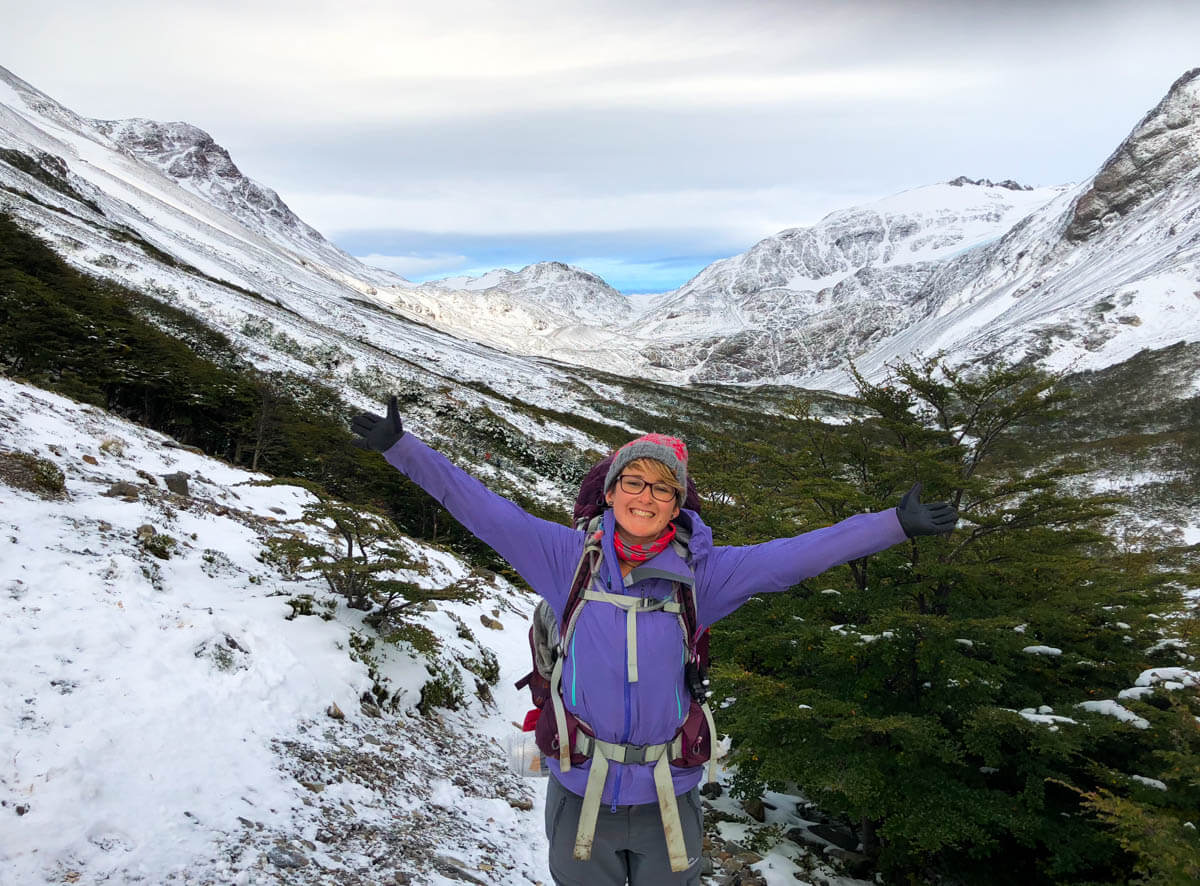
This was my first experience of a genuine season change. It was magical!
Torres Del Paine is open from September to April each year. It is important to know that the O Circuit is only open until the end of March. The entire park can also close early depending on the weather. I note it is possible to hike in Torres Del Paine during the winter months, but usually only if you have specialised expedition experience and with prior approval.
Peak
Peak season is from November to February. The busiest and most expensive time is during December and January. Some people would say that everything outside of December and January is shoulder season; however, the prices and numbers of people do significantly drop once it gets to March, and prior to November.
Shoulder
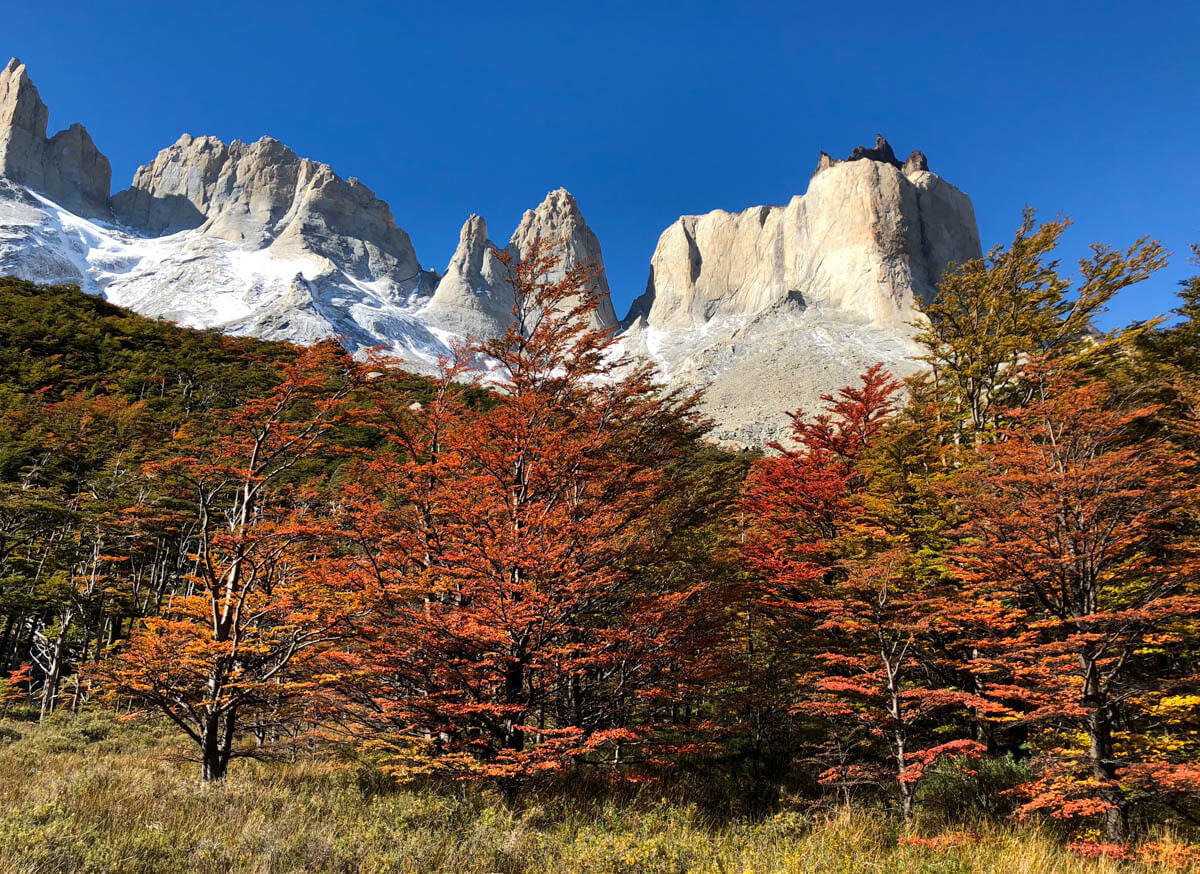
Shoulder season is in October and March. I completed the O Circuit in March and it was the cheapest and least busy at that time. This is when I would recommend attending if you want to avoid the crowds and experience more of the famous Patagonian weather.
If you don’t mind a bit of snow and are prepared for experiencing the famous Patagonian winds then the shoulder season is the way to go. We were lucky enough to see the Autumn colours roll in on the last week of March too which was pretty spectacular. I imagine October is equally as beautiful given that it is Spring. If the weather sounds a bit too intense, then aim for the middle of the Summer months.
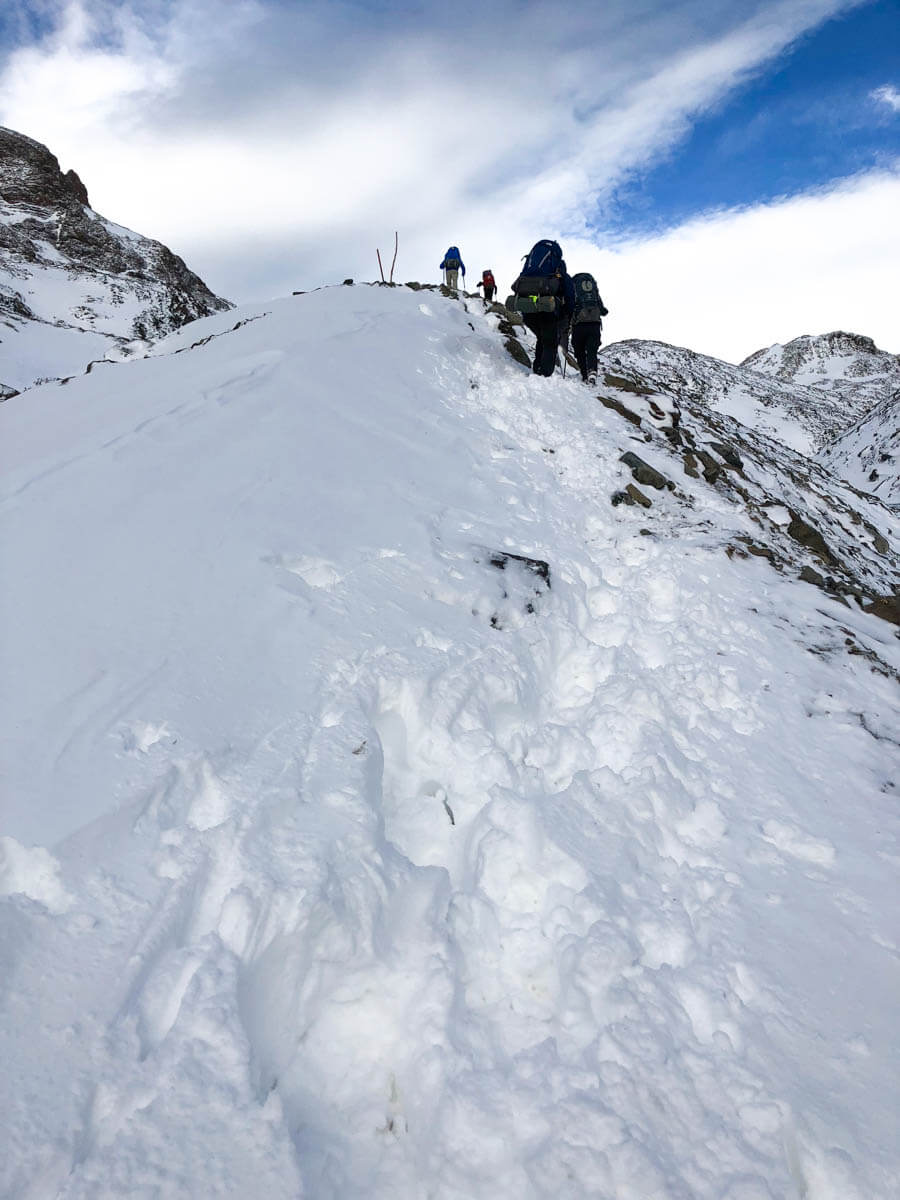
Limits for the O Circuit
Keep in mind that the O Circuit is not open in September or April like the rest of the park. The O Circuit closes at the end of March and then only the W Trek or day hikes are open. To be honest, I wouldn’t like to be going over the John Gardner Pass on the O Circuit any later in the year, as the weather up there can become quite intense. We had to hike up-hill in knee to thigh deep snow in the last week of March of 2018 while going over the pass. It had also been closed for two weeks prior to our hike due to bad weather, so I can only imagine April would not be ideal.
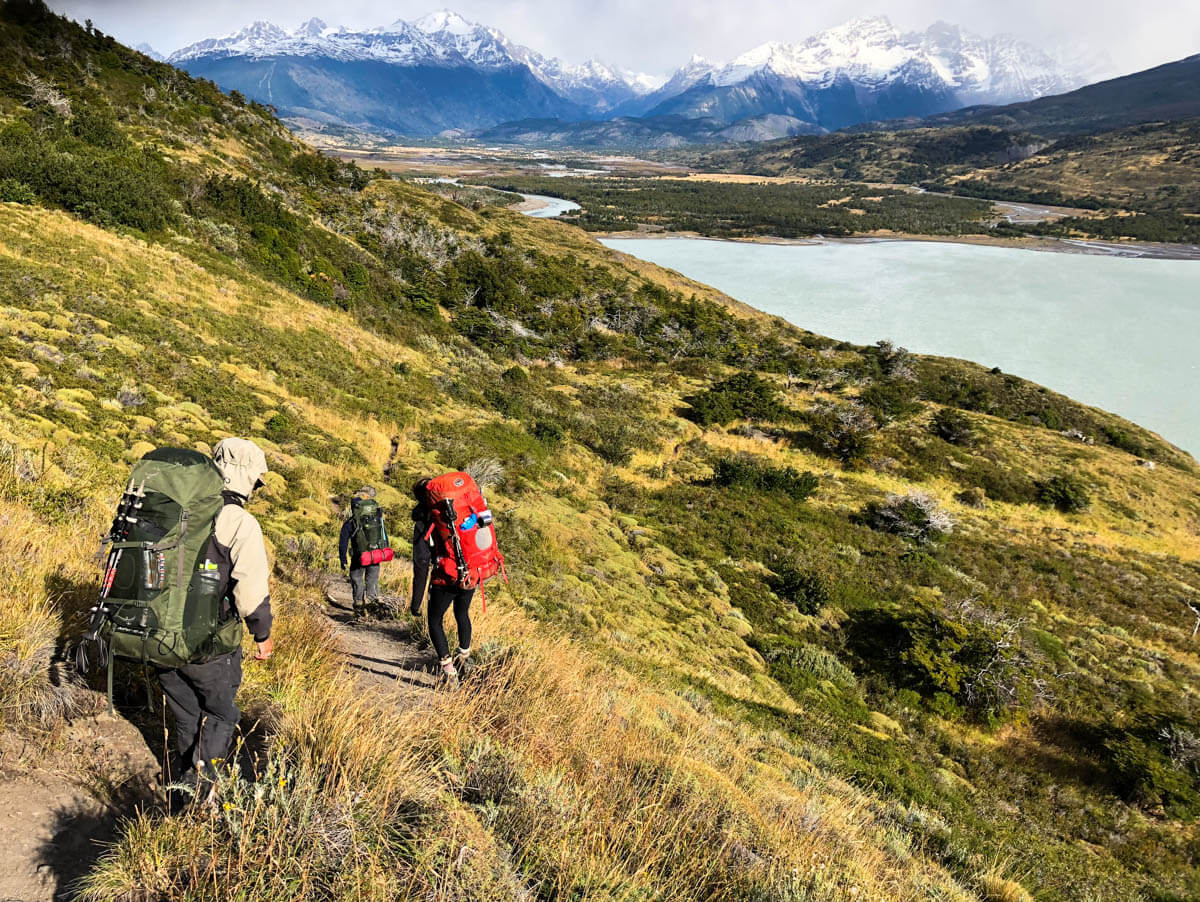
Getting There and Away
There is a little more work in organising the O Circuit than for other trails in Patagonia, but it is worth it!
Puerto Natales is the base for entrance and departure of the Torres Del Paine National Park. For further details about getting to and from Puerto Natales to other areas of Patagonia and South America, please check out my Ultimate Guide to Torres Del Paine. Once in Puerto Natales, it is very easy to get to and from Torres Del Paine to complete the O Circuit.
Puerto Natales to Torres Del Paine
Buses run twice a day from Puerto Natales to the Torres Del Paine National Park for $7,500.00 CLP ($15.50 AUD).
- 7.20am – 1 hour 30 minutes
- 12.30pm – 1 hour 30 minutes
Shuttle buses then take you from the registration centre to the welcome centre near Refugio Central for $3,000.00 CLP ($6.20 AUD). You can walk this distance but there isn’t much to see and it isn’t really worth the time. The shuttle times run according to the buses that drop you at the registration centre. They take no longer than 15 minutes to arrive at the beginning of the trails.
Torres Del Paine to Puerto Natales
Shuttle buses take you from the welcome centre near Refugio Central to the registration centre for $3,000.00 CLP ($6.20 AUD).
- 2.00pm – 15 minutes
- 7.00pm – 15 minutes
Buses run twice a day from the Torres Del Paine National Park to Puerto Natales for $7,500.00 CLP ($15.50 AUD).
- 2.30pm – 1 hour 30 minutes
- 7.45pm – 1 hour 30 minutes
How to Book the O Circuit
The more popular sites and refugios book out several months in advance, so get in quick!
You need to book in advance for all of your camp sites and / or refugio stays in Torres Del Paine. This is especially the case if you want to tackle the O Circuit.
There is a checkpoint between the Seron and Dickson campsites on the O Circuit where the rangers check Passports and your ongoing bookings before they allow you to continue on. If you do not have the required booking then they turn you around to hike back to the start.
Even during the shoulder seasons almost all of the refugios and camp sites were full for a lot of the sites around the O Circuit. You won’t get very far in the park without a booking so it is better to organise it well in advance or at least have it sorted in Puerto Natales before you get on the bus to the park.
It is also good to remember that the limits are there for a reason. Restrictions are to preserve the trails from overuse and to limit the number of people at each camp site and refugio so that they can be properly maintained. Before you try to cheat the system, which is very common during peak season, think about the impacts of overcrowding to the gorgeous natural environment of the Torres Del Paine National Park.
HOW TO BOOK
Once you have decided on your route and dates for the O Circuit, you then need to head online to reserve your sites. The three companies you will need to book through are Fantastico Sur, and Vertice Patagonia for the paid campsites and CONAF for the free national park campsites. When I completed my bookings, I tried to do them all at the same time to ensure I received all of the required dates for the O Circuit.

You are able to email the companies if you have made an error or need to alter dates, but it is a lot easier to get it right the first time. I booked around four months in advance which gave me quite a lot of flexibility in dates, especially because I was going at the end of the season, in the last week of March.
If you want to book for the peak Summer dates then you need to book as early as possible. Check the websites and forums to find out when bookings open. It was six months in advance for the 2017 – 2018 season; however, this can change.
WHAT IF IT IS BOOKED OUT
In the event you haven’t booked in advance or you left it too late and the online bookings say it is full, you can still head to Puerto Natales in hopes of there being availability. Once there you can attend the offices in person for the paid sites and try to make your bookings. When I was in Torres Del Paine in March, the online system was showing as fully booked. When my friends attended the offices there was actually still plenty of space.
It is difficult to complete the O Circuit without being able to secure camp sites at Seron, Dickson and Los Perros consecutively. If you are unable to get these three in a row for any of your preferred dates then you may need to consider hiking the W Trek instead or completing day trips, or a one night entry into the park depending on what is still available. Check out my Ultimate Guide to Torres Del Paine and my guide to hiking and preparing for the W Trek for more information about these alternative options.
Suggested Routes
DURATION
I have included three suggested itineraries to complete the O Circuit. The first route of 8 days and 7 nights is the standard itinerary that most people do. It is for an average fitness level and also includes side trips to all of the viewpoints.
I have also included an extended itinerary of 9 days and 8 nights that provides you with a bit more time out in the park and a more relaxed hiking schedule. The final itinerary is the shortest itinerary of 7 days and 6 nights. I would not recommend completing the O Circuit in anything shorter than this amount of time unless you are an experienced trail runner and plan on carrying less food and weight.
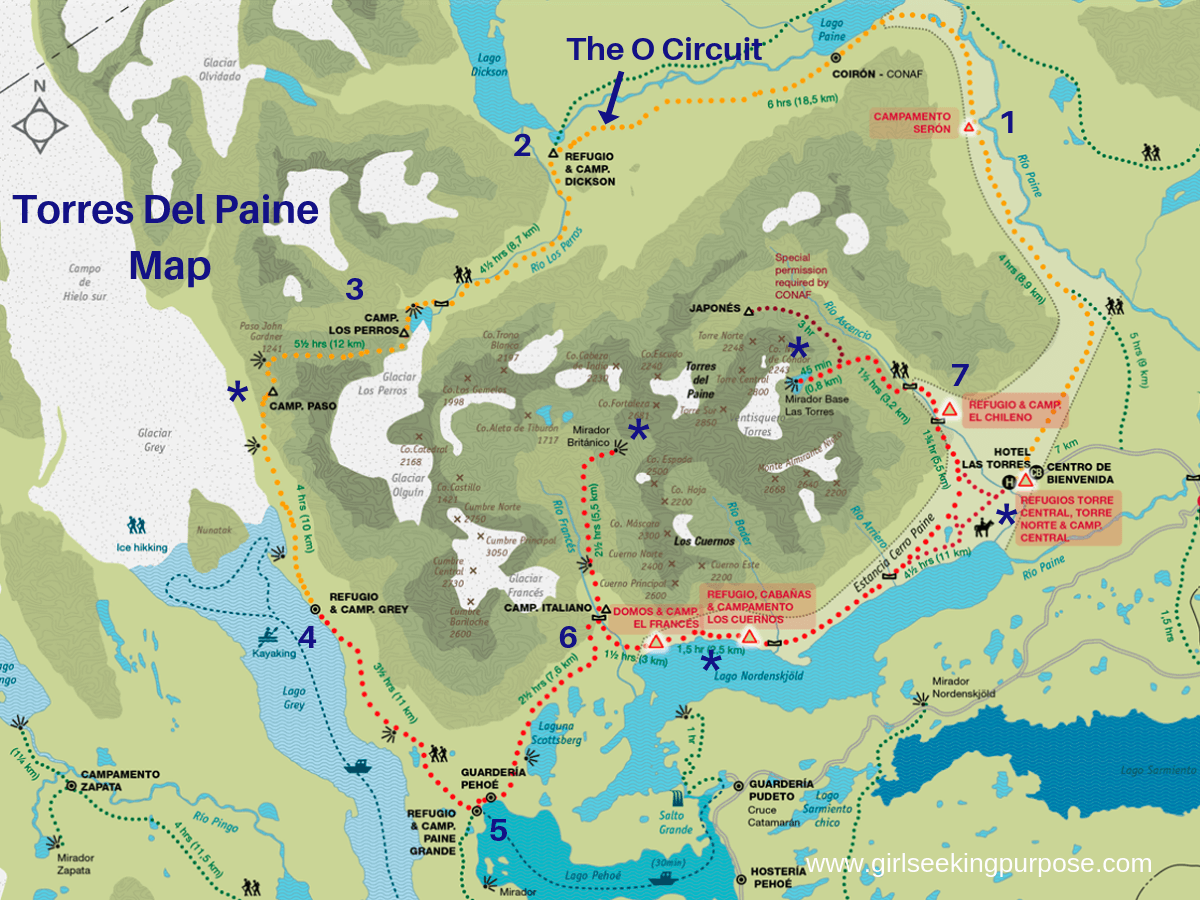
DIRECTION
If you start at the Welcome Centre near Camp Central, then the first few nights on the O Circuit are usually the same for all itineraries. After you get past the John Gardner pass and head towards the W section though, the options can start to vary. I have included a few variations along the way depending on your budget, preference, and fitness levels. I note that the free CONAF campsites have limited facilities and no refugio, which was suitable for me but is not to everyone’s taste.
You should be able to complete the O Circuit in eight to nine days if the weather allows you to go over the John Gardner Pass. A reminder that you can only hike the O Circuit in a counter-clockwise direction. You can start the O Circuit at either the Welcome Centre with the W section at the end, or from Paine Grande with the W at the beginning. Most of the people I met, myself included, started from the Welcome Centre. This allows you to end the O Circuit with the hike up to see the famous towers that Torres Del Paine, and Patagonia is most well-known for.
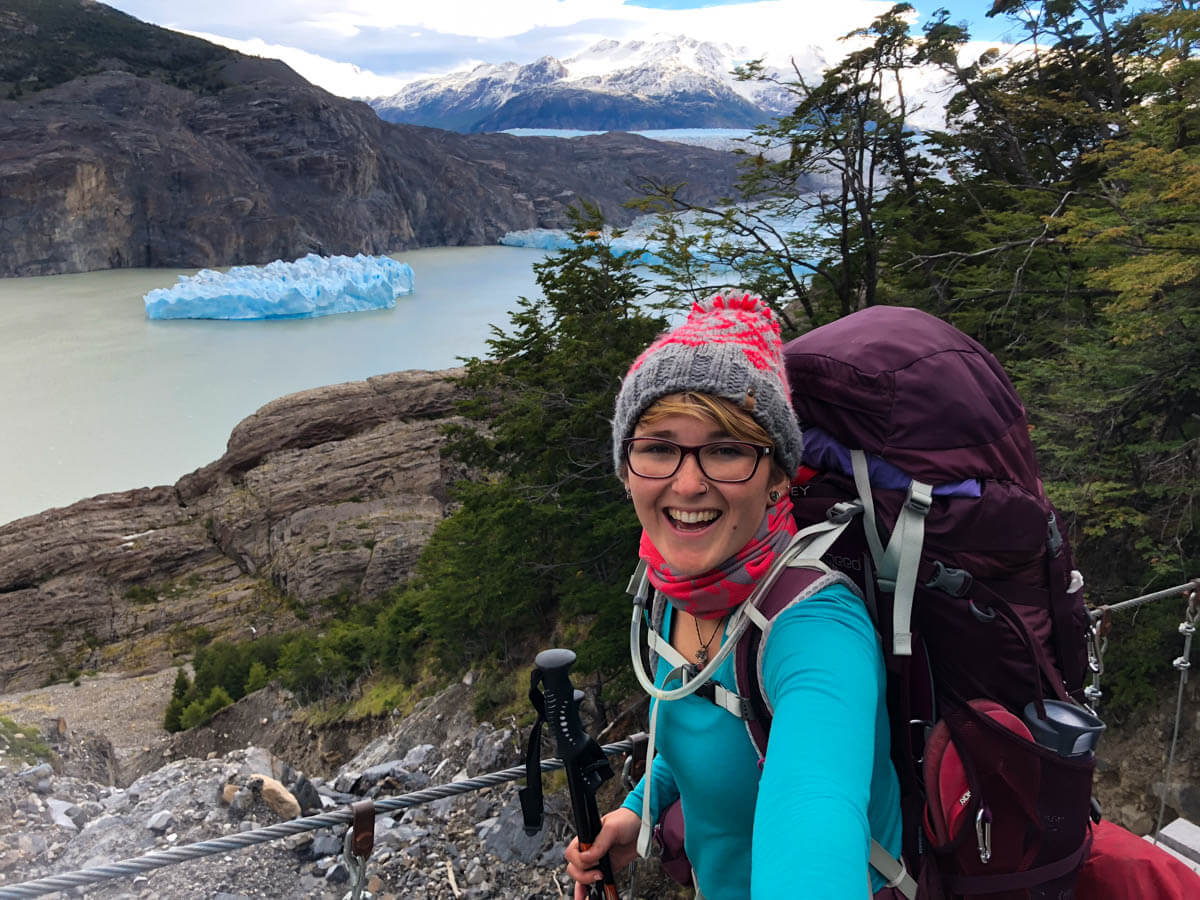
Glacier grey and the swing bridges were an amazing sight just after the John Gardner Pass.
8 Days / 7 Nights – Recommended O Circuit Route
Day 1 – Camp Seron (No Refugio)
Approximately 4 – 5 hours and 9km.
Hike from the Welcome Centre near Refugio Central to Camp Seron.
Day 2 – Camp Dickson (Refugio also)
Approximately 6 – 7 hours and 18km.
Hike from Seron to Dickson. You will pass the Park Ranger Checkpoint at the halfway mark and they will check your bookings for the rest of the O Circuit as well as sight your passport. So don’t forget to bring it!
Day 3 – Camp Los Perros (No Refugio)
Approximately 5 hours and 10km.
Hike from Dickson to Los Perros.
Day 4 – Camp Grey (Refugio also) *if bad weather you can stop at Camp Paso
Approximately 9 – 11 hours and 14.5km.
Hike from Los Perros to Paso, going over the John Gardner Pass. Ensure you leave as the sun is coming up, if not just before. Have a breakout Camp Paso and then continue onto Camp Grey. If the weather or the wind is too intense, then consider staying at Camp Paso. I had booked a buffer night here in case we couldn’t get over the pass or weren’t allowed to attempt it. Whilst it had been closed for a few weeks before we got there due to bad weather, we were lucky enough to be able to hike it.
Day 5 – Camp Paine Grande (Refugio also)
Approximately 3 – 4 hours and 11km.
Hike from Camp Grey to Camp Paine Grande.
Day 6 – Italiano / Francais (Free site or Paid site)
Approximately 2 hours and 7.5km to Italiano.
Hike from Paine Grande to Italiano. Drop your bags and/or setup your tent and then hike the return trip up the French Valley.
French Valley – Total 5 hours and 10km return.
Approximately 1 hour and 30minutes and 3.5km to Mirador Francais and then approximately 1 hour and 2.5km to Mirador Britanico. If you are not camping at the free campsite at Italiano and continuing on to Camp Francais then it is a further 30 minutes and 2km from Italiano to Camp Francais.
Day 7 – Chileno / Central (Paid site with full board / Paid site with cooking allowed)
Chileno – Approximately 6.5 hours and 22km from Italiano to Chileno. Approximately 6 hours and 20km from Francais to Chileno.
Hike from either Italiano or Francais towards Central and then take the shortcut to Chileno. This should be at about 17km from Italiano with a further 5km up towards Chileno to the left of the fork in the route. There is a small sign and the route is marked on Maps.me.
Central – Approximately 6 hours and 22km from Italiano to Central. Approximately 5.5 hours and 20km from Francais to Central.
Hike from either Italiano or Francais towards Central and continue on the trail without taking the shortcut to Chileno for a further 5km from the fork in the route. If in doubt, keep to the right of any forks in the trail.
Day 8 – Base de la Torres and then Puerto Natales
Chileno – Approximately 4 hours and 8km return from Chileno to the base of the towers and back. A further 2 hours and 5.5km back to the Welcome Centre.
Then collect your pack from Chileno and continue hiking back to the Welcome Centre to depart on the 2.00pm or 7.00pm shuttle bus back to Puerto Natales.
Central – Approximately 8 hours and 18 km from Central to the base of the towers and back.
You will leave your pack at Central in the morning and collect it on your way to the bus back to Puerto Natales.
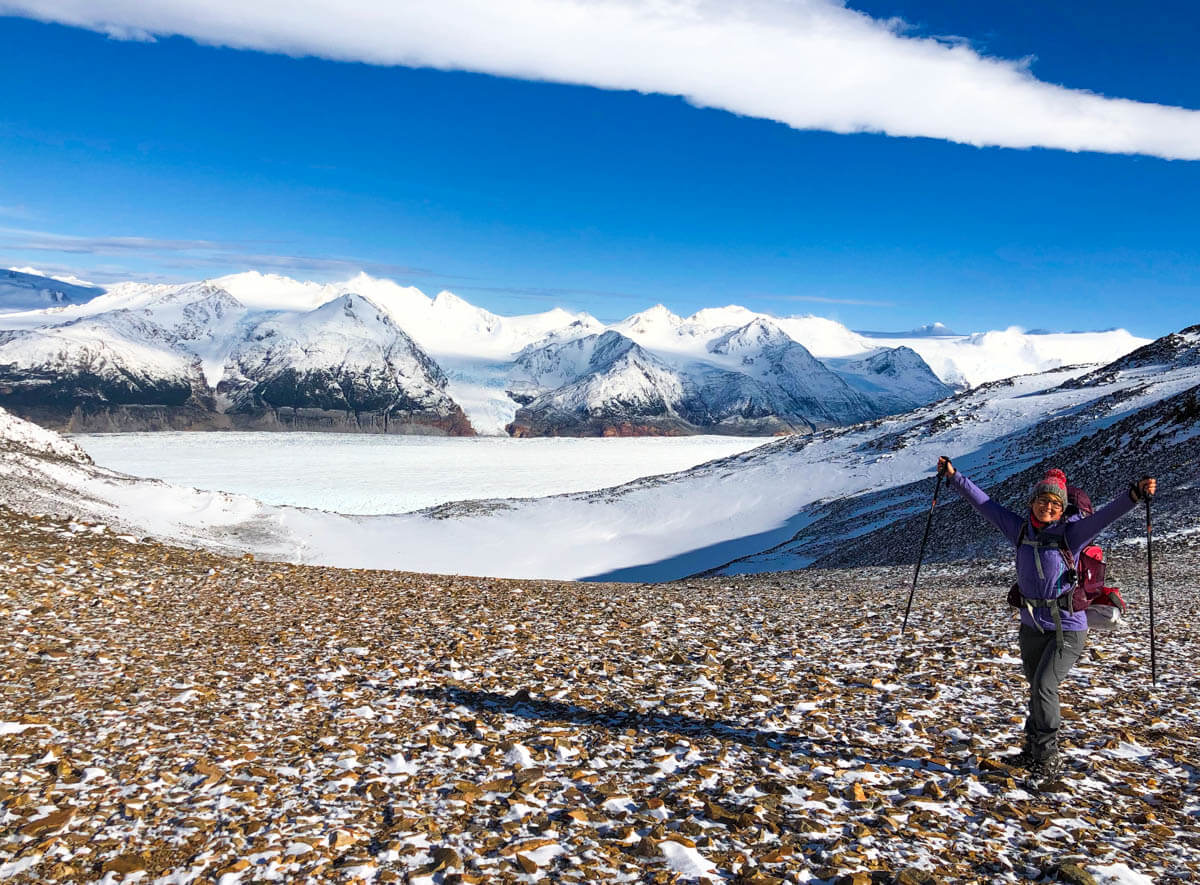
9 Days / 8 Nights – Extended O Circuit Route

I never once got tired of these views and the endless number of glaciers in Patagonia!
Day 1 – Camp Seron (No Refugio)
Approximately 4 – 5 hours and 9km.
Hike from the Welcome Centre near Refugio Central to Camp Seron.
Day 2 – Camp Dickson (Refugio also)
Approximately 6 – 7 hours and 18km.
Hike from Seron to Dickson. You will pass the Park Ranger Checkpoint at the halfway mark and they will check your bookings for the rest of the O Circuit as well as sight your passport. So don’t forget to bring it!
Day 3 – Camp Los Perros (No Refugio)
Approximately 5 hours and 10km.
Hike from Dickson to Los Perros.
Day 4 – Camp Grey (Refugio also) *if bad weather stop at Camp Paso
Approximately 9 – 11 hours and 14.5km.
Hike from Los Perros to Paso, going over the John Gardner Pass. Ensure you leave as the sun is coming up, if not just before. Have a breakout Camp Paso and then continue onto Camp Grey. If the weather or the wind is too intense, then consider staying at Camp Paso. I had booked a buffer night here in case we couldn’t get over the pass or weren’t allowed to attempt it. Whilst it had been closed for a few weeks before we got there due to bad weather, we were lucky enough to be able to hike it.
Day 5 – Camp Paine Grande (Refugio also)
Approximately 3 – 4 hours and 11km.
Hike from Camp Grey to Camp Paine Grande.
Day 6 – Italiano / Francais (Free site or Paid site)
Approximately 2 hours and 7.5km to Italiano.
Hike from Paine Grande to Italiano. Drop your bags and/or setup your tent and then hike the return trip up the French Valley.
French Valley – Total 5 hours and 10km return.
Approximately 1 hour and 30minutes and 3.5km to Mirador Francais and then approximately 1 hour and 2.5km to Mirador Britanico. If you are not camping at the free campsite at Italiano and continuing on to Camp Francais then it is a further 30 minutes and 2km from Italiano to Camp Francais.
Day 7 – Chileno / Central (Paid site with full board / Paid site with cooking allowed)
Chileno – Approximately 6.5 hours and 22km from Italiano to Chileno. Approximately 6 hours and 20km from Francais to Chileno.
Hike from either Italiano or Francais towards Central and then take the shortcut to Chileno. This should be at about 17km from Italiano with a further 5km up towards Chileno to the left of the fork in the route. There is a small sign and the route is marked on Maps.me.
Central – Approximately 6 hours and 22km from Italiano to Central. Approximately 5.5 hours and 20km from Francais to Central.
Hike from either Italiano or Francais towards Central and continue on the trail without taking the shortcut to Chileno for a further 5km from the fork in the route. If in doubt, keep to the right of any forks in the trail.
Day 8 – Base de la Torres and then Puerto Natales
Chileno – Approximately 4 hours and 8km return from Chileno to the base of the towers and back. A further 2 hours and 5.5km back to the Central.
Then collect your pack from Chileno and continue hiking back to Central for for your final night stay at Central.
Central – Approximately 8 hours and 18 km from Central to the base of the towers and back.
You will leave your pack at Central in the morning and collect it on your way back to Central for a final night stay at Central.
Day 9 – Puerto Natales
If you decided to stay at Central on your final night then today you will already be near the Welcome Centre and ready for the 2.00pm shuttle bus out of the park. If the weather permits you should be able to see a lovely sunrise from Camp Central and then enjoy some rest in the Refugio before departing.
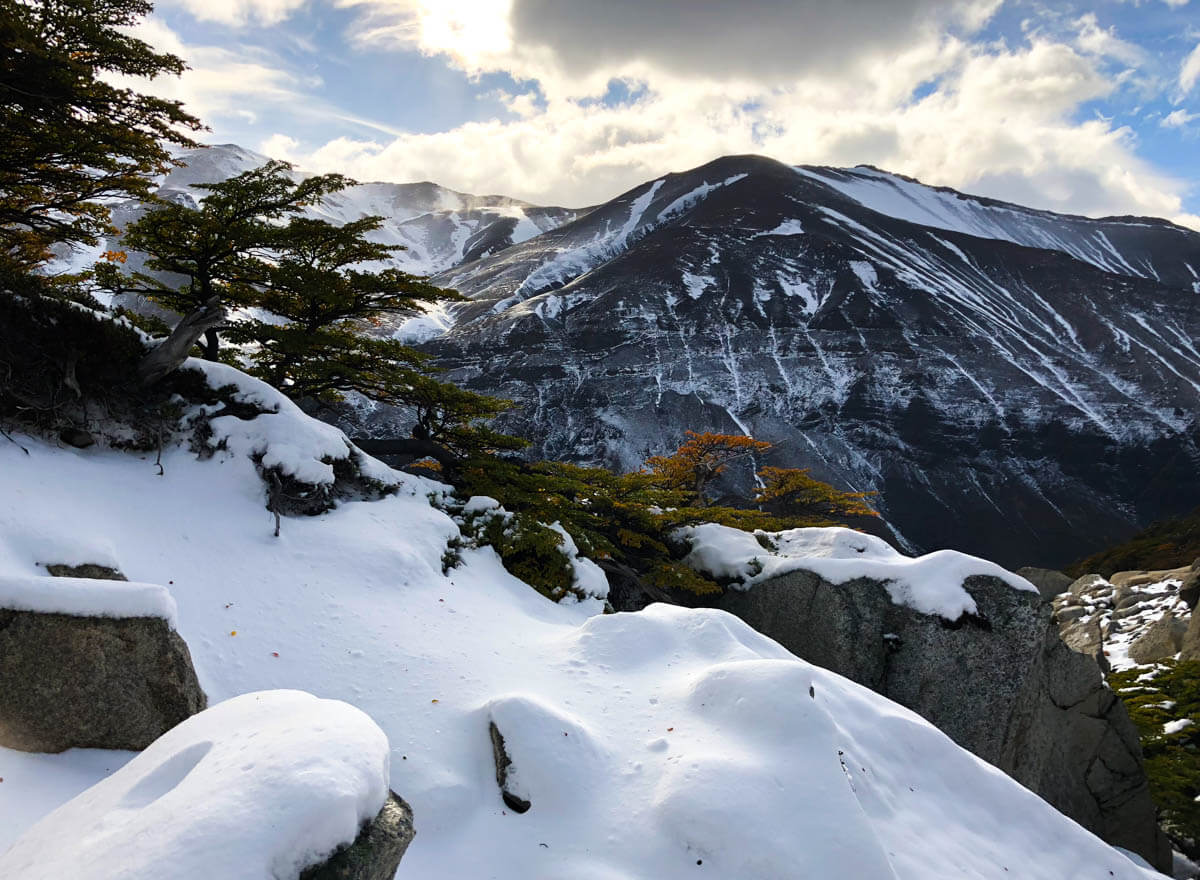
7 Days / 6 Nights – Minimum O Circuit Route
The O Circuit is so diverse. There are mountains, glaciers, snow, sun, valleys and even forests!
Day 1 – Camp Seron (No Refugio)
Approximately 4 – 5 hours and 9km.
Hike from the Welcome Centre near Refugio Central to Camp Seron.
Day 2 – Camp Los Perros via Camp Dickson (No Refugio)
Approximately 11 – 12 hours and 28km.
Hike from Seron to Los Perros via Camp Dickson. You will pass the Park Ranger Checkpoint at the halfway mark between Seron and Dickson. They will check your bookings for the rest of the O Circuit as well as sight your passport. So don’t forget to bring it! Once you arrive at Dickson, take in the surroundings and have a break. Then begin your hike onto Hike Los Perros.
Day 3 – Camp Grey (Refugio also) *if bad weather you can stop at Camp Paso
Approximately 9 – 11 hours and 14.5km.
Hike from Los Perros to Paso, going over the John Gardner Pass. Ensure you leave as the sun is coming up, if not just before. Have a breakout Camp Paso and then continue onto Camp Grey. If the weather or the wind is too intense, then consider staying at Camp Paso. I had booked a buffer night here in case we couldn’t get over the pass or weren’t allowed to attempt it. Whilst it had been closed for a few weeks before we got there due to bad weather, we were lucky enough to be able to hike it.
Day 4 – Camp Paine Grande (Refugio also)
Approximately 3 – 4 hours and 11km.
Hike from Camp Grey to Camp Paine Grande.
Day 5 – Italiano / Francais (Free site or Paid site)
Approximately 2 hours and 7.5km to Italiano.
Hike from Paine Grande to Italiano. Drop your bags and/or setup your tent and then hike the return trip up the French Valley.
French Valley – Total 5 hours and 10km return.
Approximately 1 hour and 30minutes and 3.5km to Mirador Francais and then approximately 1 hour and 2.5km to Mirador Britanico. If you are not camping at the free campsite at Italiano and continuing on to Camp Francais then it is a further 30 minutes and 2km from Italiano to Camp Francais.
Day 6 – Chileno / Central (Paid site with full board / Paid site with cooking allowed)
Chileno – Approximately 6.5 hours and 22km from Italiano to Chileno. Approximately 6 hours and 20km from Francais to Chileno.
Hike from either Italiano or Francais towards Central and then take the shortcut to Chileno. This should be at about 17km from Italiano with a further 5km up towards Chileno to the left of the fork in the route. There is a small sign and the route is marked on Maps.me.
Central – Approximately 6 hours and 22km from Italiano to Central. Approximately 5.5 hours and 20km from Francais to Central.
Hike from either Italiano or Francais towards Central and continue on the trail without taking the shortcut to Chileno for a further 5km from the fork in the route. If in doubt, keep to the right of any forks in the trail.
Day 7 – Base de la Torres and Central
Chileno – Approximately 4 hours and 8km return from Chileno to the base of the towers and back. A further 2 hours and 5.5km back to the Welcome Centre.
Then collect your pack from Chileno and continue hiking back to the Welcome Centre to depart on the 2.00pm or 7.00pm shuttle bus back to Puerto Natales.
Central – Approximately 8 hours and 18 km from Central to the base of the towers and back.
You will leave your pack at Central in the morning and collect it on your way to the bus back to Puerto Natales.
What to Pack
We ended up with knee-deep snow while hiking over the John Gardner pass. Be prepared for all weather conditions!
This is usually one of the biggest questions for a lot of people setting off on a multi-day trek in Patagonia. Deciding what to pack for the O Circuit in Torres Del Paine can be a little overwhelming, particularly if you have never done a hike of this length before.
I have put together a hiking packing post about what to pack for any multi-day hike, with Patagonia specifically in mind. It covers clothing, shelter, trekking gear, food and safety gear.
The beauty of this packing list is that you only need to increase your food, and possibly take an extra gas canister for hikes of increased lengths. All of your other gear should remain the same for hikes of two, five or even ten days. Once you’ve read that, my Ultimate Guide to Torres Del Paine, and this post, you should be ready to get out there and conquer the O Circuit.
Travel Insurance
As with any outdoor adventure activity while travelling, it is always important to have an appropriate travel insurance policy. I used World Nomads for my trip to South America and it covered me for all of my different adventure activities and hiking while in Patagonia.
I personally loved that the explorer policy covered hiking up to 6,000m, which is not always covered by other travel insurance policies. I was also able to claim through my policy for the damage to my mirrorless camera that happened whilst I was hiking in Patagonia.
Get a quote now for your preferred dates.
Extra Information
Can You Hike it Solo?
Yes You Can!
If you are like me, and you are a solo traveller, or you will be solo for your time in Patagonia then you may be concerned about whether you can or should hike the O Circuit solo. I am here to tell you that it is very possible and doable.
Don’t ever let the fear of being alone stop you from chasing your dreams!
As there are designated camp sites and refugios for the entire of the O circuit, everyone ends up staying in the same places, especially for the first few nights of the trail. Given the number of people who also head to Torres Del Paine each year, there is rarely ever a shortage of people on the trail. While the O Circuit is far less busy than the W Trek, there are still around 80 people on the back of the O Circuit at any one time.
So even if you start the trail as a solo hiker, you will never be truly alone on the trail. You may even find that you meet someone in Puerto Natales at your hostel or accommodation before you start the hike.
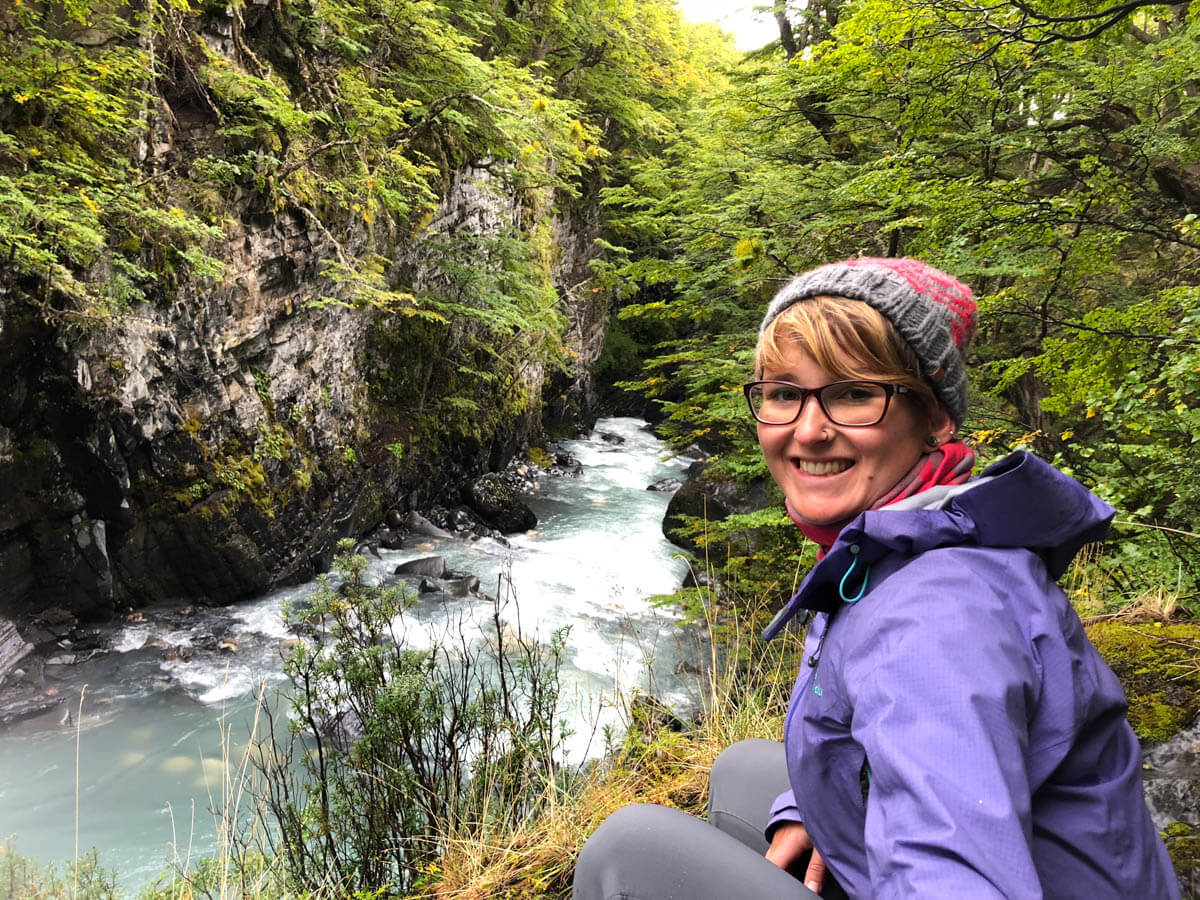
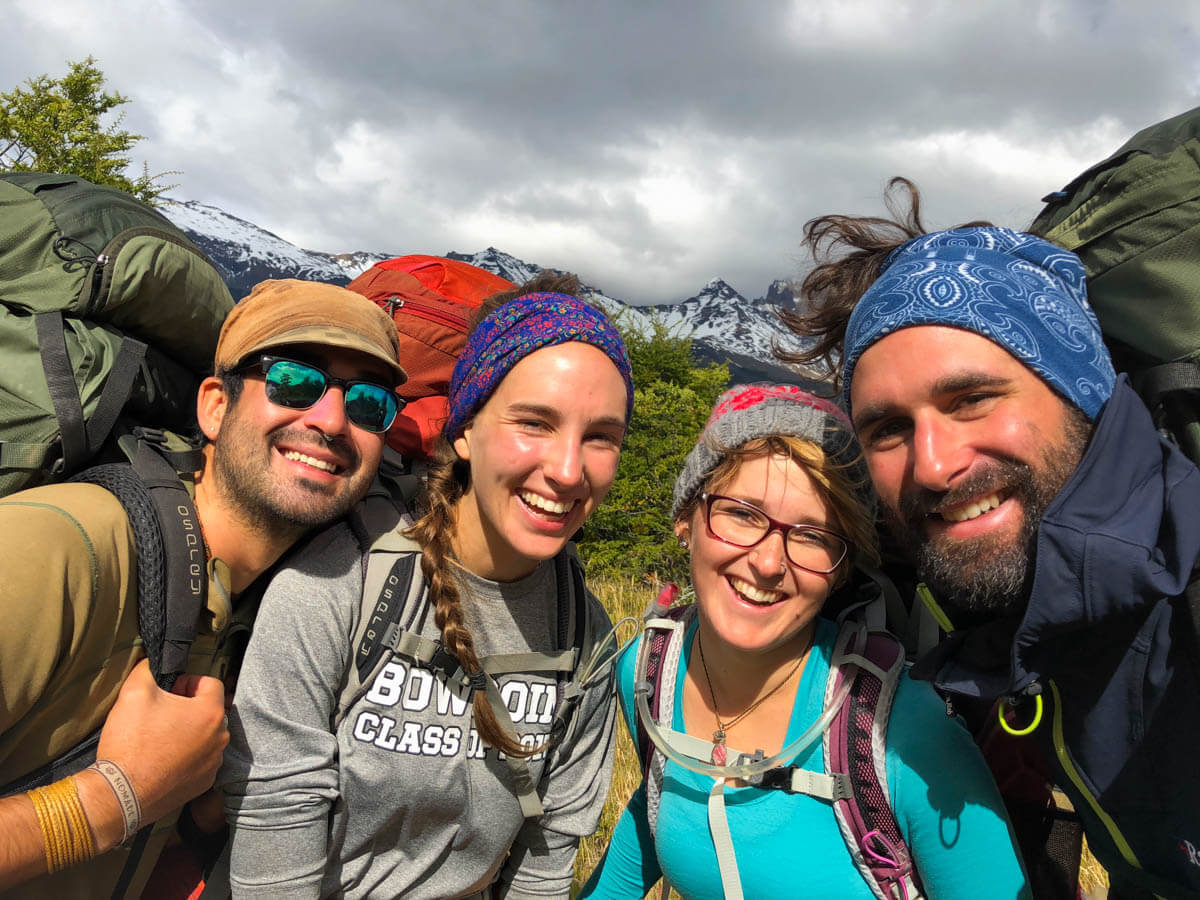
My Personal Experience as a Solo Hiker
I arrived in Puerto Natales as a solo hiker. I ended up meeting someone in my hostel who was starting the O Circuit the same day as I was so we decided to tackle it together. We then met two other solo hikers at the very first campsite who we continued to hike with. From there, our group of four turned into a group of six and before we knew it we had ourselves a spontaneous hiking group.

Making friends along the way was all part of the fun of the O Circuit!
The O Circuit Is the Perfect Place to Make Friends
There is definitely a level of camaraderie between hikers of the O Circuit. Even if you don’t want to hike with other people during the day, you will get to know everyone at the camp sites on your way around and will have plenty of opportunity to mingle of an evening. Everyone tends to look out for each other as well.
So please don’t avoid the O Circuit or book an organised tour because you are a solo hiker. I have faith that you will meet plenty of people to hike with, share the camp sites with at night, and share the overall experience of the O Circuit with.
Making friends on the trail was one of the highlights!
What to do with Your Non-Hiking Gear
While I was planning my trip to Patagonia, one of my first concerns was what I would do with all of my extra travel gear that I didn’t need for my multi-day hikes. I was travelling for six months through South America at the time so I had a lot of extra gear that I didn’t really want to carry while hiking.
Luckily, the hostel owners in Patagonia know that this is the case for most travellers and hikers so most of them will let you leave any extra gear behind in storage while you complete your hike. In most areas of Patagonia, particularly on the Carretera Austral and in Bariloche, I found the hostels stored my extra gear for free. In Puerto Natales, a lot of the hostels charge a small storage fee. As I mentioned in my Ultimate Guide to Torres Del Paine, Puerto Natales can be a bit more expensive than the rest of Patagonia because it is quite remote and very popular.
A lot of people emptied their extra gear into garbage bags or spare daypacks they had with them that weren’t needed on the trail. I used the Osprey transit cover that I bought to protect my hiking backpack during transit as my ‘storage bag’. I never had any issues with security or theft of any of my items that I left behind while I was on the trails. But obviously there is always a chance that this could occur. My belongings always felt very safe while in Patagonia so I was never really concerned.
Can You Charge Electronics
Personally, I preferred to just take extra camera batteries and a power bank to recharge my phone. If you don’t have a power bank, or really need to make sure electronics are charged along the way, then it is possible to charge your electronics on the trail.
Most of the other hikes in Patagonia will not provide this level of luxury; however, most of the refugios on the W Trek and a couple of the stops on the back of the O Circuit provide you with access to power points. Obviously, please don’t depend on needing power to run anything, but if you occasionally need to charge something during your hike then it is an option.
Wifi is available to purchase on the W Trek. But I would recommend avoiding the temptation and just taking in the beauty of the park and the incredible people you meet along the way. Being completely disconnected, living in the moment, and experiencing the trail without distraction is one of my favourite aspects of hiking.
Other Recommended Reads
Patagonia is just so beautiful!
If you are headed to Patagonia to tackle the O Circuit then I highly recommend also reading my Ultimate Guide to Torres Del Paine, which includes additional information about Puerto Natales, gear hire and preparation for the hike.
If the O Circuit sounds a little too intense, or you don’t have enough time to complete it then you should definitely check out my guide to completing the W Trek, which is a shorter and less remote hike. The W Trek forms part of the O Circuit, but has higher numbers of traffic than the O Circuit and also doesn’t require you to cross the John Gardner Pass.
For anyone wanting to check out more of the incredible hiking, landscapes and views of Patagonia then I would suggest reading my posts on some of my other favourite spots and hikes throughout the entire Patagonia region:
- The Best Hikes in El Chaltén, in Argentina
- The 4 Day Trek to Cerro Castillo, on the Carretera Austral in Chile
- Hiking and Camping in Pumálin Park, on the Carretera Austral in Chile
- The Best Hikes in Bariloche, in Northern Patagonia, Argentina
- Adventure Activities and Hiking on the Carretera Austral, Chile
Save it For Later
If you found this guide useful then save it for later on Pinterest. Feel free to share it with any hiking obsessed friends on social media as well.
If you have any questions then please ask me in the comments section. I will answer them to the best of my knowledge. Patagonia will change your life!
--Girl Seeking Purpose