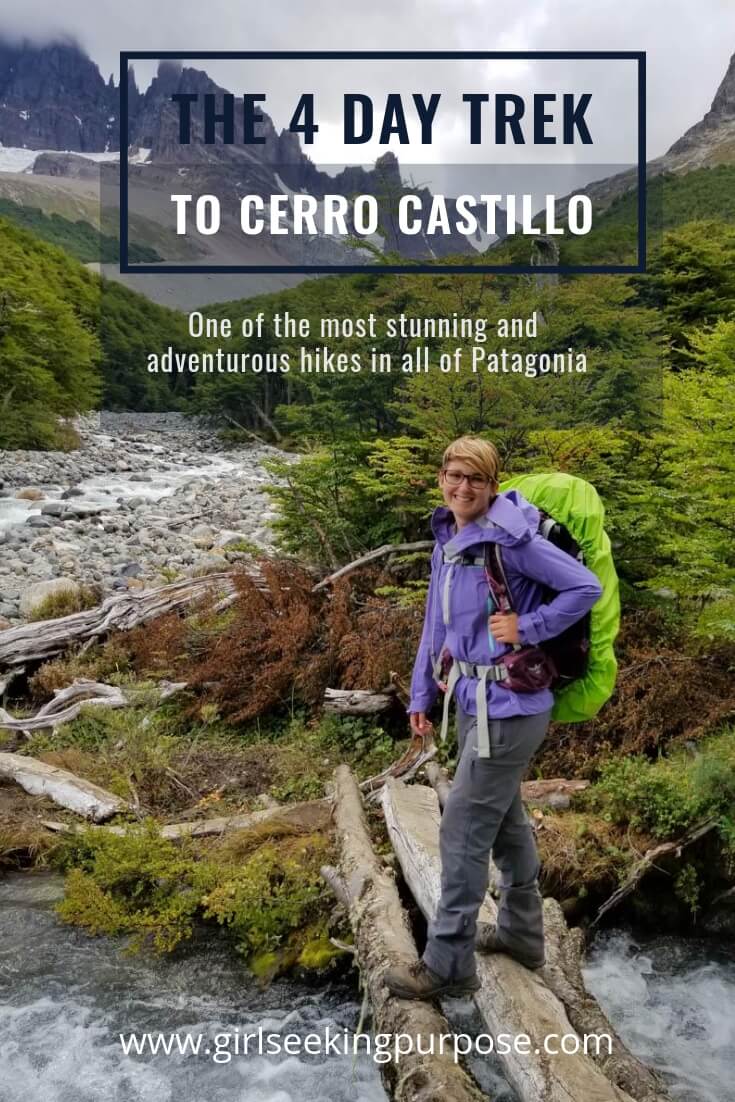
Experience the gorgeous views on the 4 day trek to Cerro Castillo yourself!
The four day trek to Cerro Castillo was one of my favourite hikes from my entire six weeks in Patagonia.
The views were so enormous that I felt so small amongst it all. The trails were well marked but not too well trodden. And there were only a few people on the trail and at the camps with you. You could really immerse yourself in the nature and take it all in. And that’s exactly what I did.
I arrived in the quaint little town called Villa Cerro Castillo after hitchhiking my way down from Coyhaique. My first week of hitchhiking on the Carretera Austral was full of camping and hiking in Pumalin Park, white water rafting in Futaleufu and adventures with my new found friends in the Queulat National Park.
My second week on this stunning and remote highway started in the town called Villa Cerro Castillo. It is situated at the base of the brooding and snow capped mountain, Cerro Castillo. This town and this mountain are yet another reason why the Carretera Austral holds a very special place in my heart and why I fell so deeply in love with Patagonia.
This post contains affiliate links, which means that if you follow a link for a product or service and make a purchase, I receive a small payment at no extra cost to you. I only recommend products or services that I have used, trust and would honestly recommend to my readers. Building affiliate links into my site will help keep my blog going and continue to allow me to produce the content that I hope you are all enjoying reading.
Why Complete the 4 Day Trek
Most people who make it to the town of Villa Cerro Castillo only complete the one day up and back hike to the Mirador at the Cerro Castillo Laguna.
Yes, the views of the piercing turquoise lake that sits below the sharp peaks of Cerro Castillo are life changing. But some of the truly awe inspiring sections of the hike were actually before we got to the lake, on day two of the four day trek. If you only do the one day hike you miss out on a lot of stunning glaciers, mountains, rock formations and snow. I really do recommend anyone with their own camping and trekking gear to opt for the four day Las Horquetas hike to see Cerro Castillo.
If you find yourself absolutely drawn in by Patagonia and the Carretera Austral, and you want to truly experience this mountain in all it’s glory, I urge you to take on the full four day hike. The following is everything you need to know about the route, how to get there, and how much it will cost.
The Route to Cerro Castillo
Day 1
16km, approximately 4-6 hours (took us 5 hours)
Getting to Camp
The first day of the hike is not very challenging and is a good warm up for the inclines to come. It is quite relaxing as you walk through the farmlands towards the mountains. Keep an eye out for the cows along the way and try not to sink in the mud.
While the distance covered isn’t too far, the estimated hiking time is including several river crossings which add to the time significantly. It is recommended to take off your hiking boots and socks to cross the rivers so that you don’t risk having wet socks and boots for the rest of the trek. Trust me, I learnt this the hard way and had very cold and wet feet all day.

Sneaky snap caught by my hiking buddy Michael while I was taking a photo of the rolling hills.
You should skip the first campsite and stay at Segundo Camping. It is perfectly located by the river, in amongst the trees. This camp provides easy access to pure glacial water which is safe to drink and cook with. It also allows for a very relaxing evening with the beautiful sounds of running water in the background. Also handy to know, is that there is a drop toilet here.
Don’t forget to BYO toilet paper and pack it out with you. Also remember that you only need to carry minimal water on this trek as you can refill constantly and easily from several glacial rivers throughout the hike.
Glacial Lake Trail
Once you set up camp, I would then suggest you head to the Glacial Lake Trail. Leave your backpack at camp and complete the two hour return trip to this side hike. It is definitely worth the time and extra effort, as the views at the end of the trail and the entire way along it are very rewarding. It is a better idea to complete this return trip on the afternoon of day one instead of the next morning. The next day is a little steeper and harder than the first day so you will need all the energy you can get.
Timing
We started the hike on day one at 8.30am and arrived at camp at 1.30pm. We set up, had a quick lunch and then headed to the glacial trail. While we were gone for three hours, we spent a lot of time at the end of the trail by the lake taking photos. When the views were like the below photo, can you really blame us? If you are short on time though, it can easily be done in two hours.

The glacier was the other way…but we actually really loved the view of the glacial lake with the red mountains in the background.
Day 2
12km, approximately 5-7 hours (took us 7 hours with some significant breaks to take in the views)
Steep Ascent Through the Forest
We left camp by 10.00am on day two. The first section is through the forest and is quite steep. I’m sure my hiking buddy became tired of listening to me dying on those constant uphills. The climb is worth it though, as the valley you see as you exit the forest is full of so many colours, textures and rays of sunshine poking through the clouds.
After this section the trail opens up a lot as you make your way through a wide valley. This section is a steep rocky climb up towards the pass you will soon be hiking over. I found this a bit easier than the steepness of the forest as you can hop from rock to rock without noticing it in your legs as much. The views in all directions really are breath taking, which also helps keep you distracted from the ascent.

It doesn’t get much more heavenly than this.
The Snowy Pass
Once you get closer to the top of the pass, you may encounter some unexpected snow coverage. This will vary depending on the time of year and snowfall, but according to the locals it is quite common.
The wind also picked up significantly for us at this point and it became quite cold. On the way over and down the pass there was a lot of icey snow and it was quite slippery. I would recommend using hiking poles for this section, but it is doable without them. As one girl we met on the trail told us, sliding down on your butt is a perfectly good alternative.
As you go over the pass you are rewarded with intensely gorgeous views in every single direction. Looking backwards, you see the rocky and colourful valley you have just ascended. To your left and right are steep and sheer cliff faces covered in loose black rubble and snow. Ahead of you is the next dramatic valley with mountains in the distance of a burning, fiery red colour.

My first experience hiking through snow. I was very grateful to my friend Michael for lending me one of his hiking poles, and for this awesome shot.
After the Pass
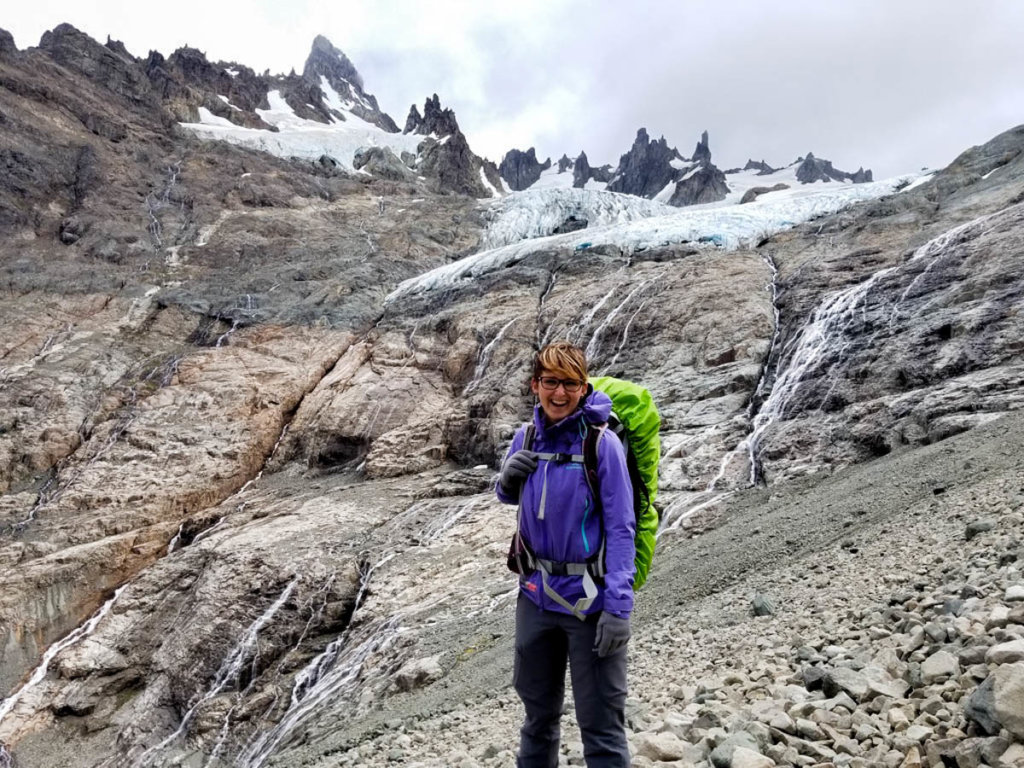
After you clear the pass, the trail opens up as you head down towards the valley. As you come around a bend, you are greeted by one of the most spectacular views in all of Patagonia. The below photo doesn’t do the grandness of this rocky cliff face justice. Both myself and my hiking buddy were lost for words as we gazed up at the hundreds of waterfalls that cascaded down the rugged wall from the giant glaciers that were perched on the top.
The multi-day hike to Cerro Castillo was when I really started to fall in love with hiking and Patagonia.
The Descent Down the Pass
After we caught our breath and processed what we had just seen, we began the descent down from the pass. This area consists of a lot of rocks and therefore takes a little time but I don’t believe it is too difficult. The colours off in the distance are so vibrant and varied. While we were capturing the moment below, we could see the Cerro Castillo laguna off in the distance beckoning us to continue exploring.

Two very happy campers on our way down the pass. The colours and textures of this place blew my mind!
The trail then leads back into the forest again and zig zags across the river. All of the river crossings have logs and rock bridges so there is no need to take off your hiking boots to cross. I still somehow managed to fall in and ended up half soaked for the rest of the day. A log bridge also collapsed while another hiker was crossing leaving her completely drenched. So I would suggest to take note of the condition of each bridge before crossing.
After that section there are some more steep inclines in the forest, another opening with another large hanging glacier and then more views of the sheer and imposing mountains. Your mind will continue to be blown, over and over again.

Another sneaky snap taken by Michael as we approached the next giant hanging glacier. I look so tiny there at the foot of the mountains.
Camp Latetera
You should skip Camping El Bosque and continue on to Camp Latetera, amongst the trees. It makes for a longer day on day two but allows you to go over the next pass earlier the following day. This will give you a better chance of good weather at the Cerro Castillo mirador (viewpoint) as well because it will be earlier in the day.
If you want to camp at Latetera, I would recommend trying to get there a littler earlier than we did. Most of the spots in the trees were already taken when we arrived. We struggled to find a spot that had good coverage from the wind, although the weather was actually okay overnight. Also worth noting, is that this camp site does not have a drop toilet, but does still have access to glacial water.
Day 3
Option 1: 9km, approximately 3-4 hours (30 mins – 1 hour to Mirador Castillo Laguna, then 2-3 hours to town)
Option 2: 18.6km, approximately 5-7 hours (1.3km to Mirador Castillo Laguna, 5.3km to Camping Los Porteadores, then 12km return to Mirador Duff Laguna)
The Cerro Castillo Laguna and Viewpoint
After hiking for less than ten minutes you will arrive at the Cerro Castillo Laguna, looking up at Cerro Castillo. Make sure you take some photographs from the base. You will capture a very different view at the base compared to what is obtainable from the one day hike. Unfortunately, we had a lot of cloud coverage on the day we were here so we could not actually see the peaks of Cerro Castillo. Despite this, the Laguna was still gorgeous and was even more turquoise in real life than it appears in the photos. Unbelievable, right?

This place was stunning even if we couldn’t see the peaks!
You then begin the ascent up to the ridge across a lot of rocks. This is quite steep and the rocks are somewhat loose, but it should only take around 30 minutes. Once at the top of the ridge you will have another opportunity to take more photos of Cerro Castillo and the Laguna. If weather and visibility is good then proceed up to the viewpoint and back before continuing on. This viewpoint is a little difficult to find, but it is located on Maps.me and is off to the left if you are facing away from the laguna.

I always love a good scramble and rock climb. Especially when they are the perfect size for rock hopping!
Fork in the Road
From this point you then have two options. The first is to take the “emergency exit” back down to Villa Cerro Castillo. This will make the hike three days and from the camp site should take you around two to three hours. This is also the trail that the one day hikers use to gain access to the viewpoint, so it can be busy at times.
If the weather allows and you would like to continue on for a third night on the trail then continue up over the pass to the next camping spot, Camping Los Porteadores.
On the day we completed the hike the weather was very windy, raining and with a lot of fog and clouds. Visibility was minimal so we waited for around one hour to see if it improved, but it became significantly worse. With almost no visibility at one point we decided to take the emergency exit down, knowing it may be a bit risky to attempt the next pass in those conditions.

We eventually lost all visibility not long after this shot was taken. We were glad we didn’t leave it too much longer because we could barely see where we were going on our way down.
New Zealand Campsite
If you decided to continue on, the next section has a few options also. You can arrive at the first camp site, set up camp and then hike up past the New Zealand Camp to the Duff Laguna and back with a day pack. The other option is to go past the first camp and then setup at the New Zealand camp site and then hike to the laguna and back. This will mean you have to back track with your pack in the morning and have a longer descent.
The third option is to set up camp at either options and then complete the laguna hike the following morning. This would make your last day quite long. It would probably only be suitable if you setup at the New Zealand Camp.
Day 4
11km, approximately 3 hours (may vary) from Camp Los Porteadores
If you completed the return hike to the Duff Laguna on day three then you can pack up camp and head back to town after breakfast. At the bottom of the trail you will find yourself on a backroad, the X-720. You will be a little further out of town then where the emergency exit puts you. At this point, you will need to walk or hitch hike back to town along the side road.
Villa Cerro Castillo
Getting There and Away
Getting There
There are a few ways to get to and from the town of Villa Cerro Castillo and then the hike itself. The town is located between Coyhaique and Puerto Rio Tranquillo. There are buses that run between Coyhaique and Puerto Rio Tranquillo that you can take and then exit in Villa Cerro Castillo on the way. The timetables constantly change so check in the town when you get there for exact times.
Getting Away
Leaving Villa Cerro Castillo is a little more difficult because none of the buses depart from Villa Cerro Castillo. You will need to wait for the other buses to come through the town on their way North or South and hope that they still have space. The timeframes vary for the arrival of these buses as it depends how long it takes them to get to Villa Cerro Castillo from their destination of origin. This means you have to be ready and waiting for a fairly wide window of time.
Alternative Options
There is also a private bus provider that runs from Villa Cerro Castillo to Coyhaique and Puerto Rio Tranquillo. This needs to be booked in advance from the restaurant/supermarket near the bus stop. I note that this fills up fast and is not that reliable either as it sometimes does not arrive. This unfortunately happened to my hiking buddy.
The option I used to get to and from Villa Cerro Castillo was to hitch hike. It took a little while to get there from Coyhaique but leaving was a little quicker. This is sometimes the best option, especially on the Carretera Austral. To be honest, it is also the most fun. You not only obtain transport from A to B, but you also get the opportunity to meet locals or other travellers. It’s the perfect time to practice your Spanish speaking skills and you also feel like you are on a real adventure.

Roadside selfie after hitching two rides from Coyhaique on our way to Villa Cerro Castillo.
The Cerro Castillo Hike
Getting to the Hike
Getting to the starting point for the hike can be a little hard as well. The starting point is about 40km north of the town, on the Carretera Austral. There is a private bus that is run by the supermarket/restaurant that will cost you $5,000.00 CLP ($10.30 AUD). The other option is to hitch hike. We were lucky that the hostel owners’ son was driving to Coyhaique the morning we wanted to leave for the hike. He was able to drop us on his way for a small fee. It meant we started the hike a lot earlier than planned, but also meant we had the trail completely to ourselves on day one.
Entrance Fee
The entrance fee for the trail is $5,000.00 CLP ($10.30 AUD). There are no fees payable at the campsites so it is a very affordable hike. The amount is payable to the rangers from around 8.30am at the hut at the entry.
The one day hike is actually more expensive, at $10,000.00 CLP ($20.75 AUD) as the entry is via private property. The trail up and back to the viewpoint from this entry is also fairly plain and lacks all of the amazing, life-changing views that we were able to see on the four day hike. This is yet another reason why I urge you to opt for the multi-day hike to Cerro Castillo and not just the one day.
Travel Insurance
No outdoor hiking guide would be complete without travel insurance. While you can take every precaution under the sun to ensure the safety and security of yourself and your belongings, you just never know what is going to happen. That is why I always make sure I have adequate travel insurance before I travel or hike anywhere. For my last three long term adventure trips, my preferred travel insurer has been World Nomads.
If you decide to use them for your next trip or hike and you would like to support this blog, then please make your purchase through the below quote link and I will receive a small commission at no extra cost to you. As always, make sure you read their product disclosure statement and check that it is suitable for your needs before proceeding.
What to Pack
My last piece of advice with regards to hiking the four day trek to Cerro Castillo is what you should pack If you are only doing the day hike then you really only need snacks, water, and layers for potential weather you may encounter. On an average day hike I usually take the following items;
- 18L Osprey Ultralight Stuff Pack
 or Osprey 20L Tempest day pack
 - Fujifilm X-T2 Camera, a wide angle lens and a general purpose / portrait lens, and accessories
- CamelBak water reservoir / Nalgene water bottle
- Snacks (muesli bars, dried fruit and nut, Clif bars and / or fresh fruit or snacks depending on the length of the hike)
- Water/windproof jacket if the weather turns — this jacket from Arc’teryx is excellent quality, or or a jacket from The North Face
- XT Ultralight Packable Down Jacket or Arc’teryx fleece in case it will be cold at the summit or if completing a sunrise hike
- Headlamp in case you lose light
- Phone for emergencies and maps.me
- First Aid Kit
- Personal Locator Beacon (PLB) — depending on how remote your hike will be, although I always carry one regardless
If you are hoping to tackle the four day trek then you will need a lot more gear, specifically designed for overnight hiking in the Patagonian weather. I highly recommend heading over and checking out my post about what to pack for multi-day hikes. That hiking guide provides you with a detailed packing list for clothing, shelter, food and cooking, as well as safety and emergency gear for any multi-day trek. There is a downloadable checklist as well to use the next time you are packing.
Recommended Reads
For anyone wanting to check out more of the incredible hiking, landscapes and views of Patagonia then I would suggest reading my posts on some of my other favourite spots and hikes throughout the entire Patagonia region:
- The Best Hikes in El Chaltén, Argentina
- The Best Hikes in Bariloche, Argentina
- Hiking and Camping in Pumálin Park, on the Carretera Austral in Chile
- Adventure Activities and Hiking on the Carretera Austral, Chile
- The Ultimate Guide to Torres Del Paine and The O Circuit, Chile
Save it for Later
If you are headed to Patagonia soon then why not save this guide about the four day hike to Cerro Castillo for later on Pinterest? You can share it to Facebook with friends and family as well. If you have been to Patagonia and know of an incredible hike not included here, then please leave it in the comments section below so I can add it to my list for next time. Let me know if you have any questions!
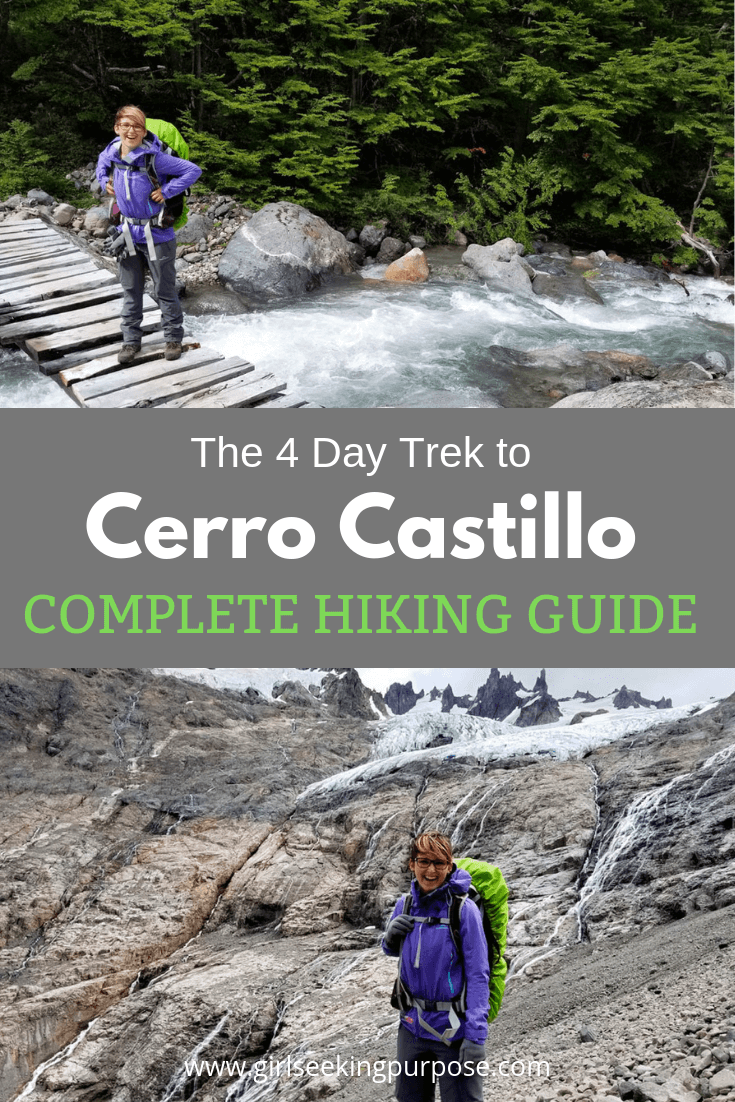
Save this pin about the 4 Day Trek to Cerro Castillo for later on Pinterest!
-- Girl Seeking Purpose
Great write-up, very useful for trip planning. I may have missed this, but what time of year did you do this hike?
Hi Helen,
Thanks for taking the time to comment, I’m glad you found the post useful. I completed this hike in mid-March, so getting towards shoulder season. There was a bit of snow on one of the passes, but it was otherwise okay. I think it would be find to do this hike anywhere from October to March with standard gear, just check the weather and track conditions before heading out.
Thanks,
Caitlyn
Great story and photos. Some trails are so busy with people that is not so enjoyable, but I see that your trail was perfect experience with wonders of nature 🙂 I need to finally go to Patagonia. Have a good day 🙂
Hi Ann,
Thank you!! I really enjoyed Patagonia, but can definitely agree. There are some parts in Patagonia that are way too busy (like the W Trek in Torres del Paine), but overall it is so worth it and there are still plenty untouched places to explore. The busy spots are still worth it too but good to get off the beaten path too!!
Thanks,
Caity