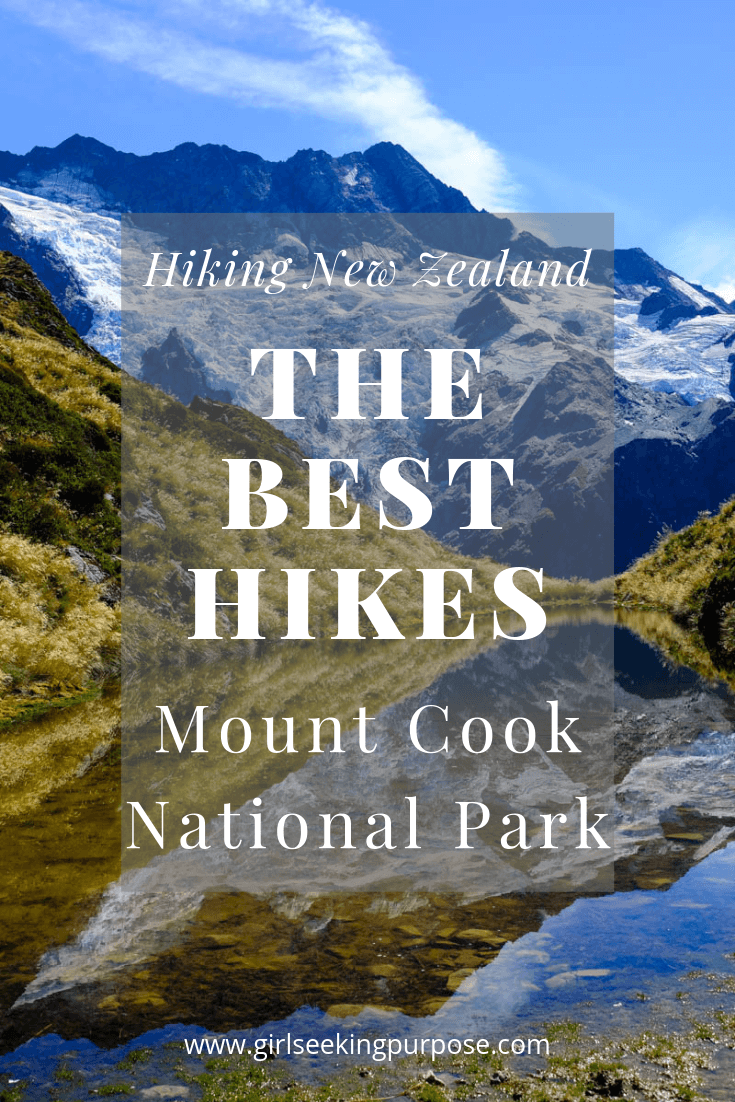
Save this Pin about the Best Hikes in the Mount Cook National Park for later on Pinterest!
Mount Cook / Aoraki National Park is home to the picturesque and snow capped summit of Mount Cook.
You will see the stunning Mount Cook peak well before you arrive in the Mount Cook National Park. Once you are in the Hooker Valley you will find yourself surrounded by enormous glaciers, turquoise lakes, sprawling ridge lines and winding rivers. With a wide range of hiking, camping and adventure options, Mount Cook is a destination that should definitely be included in any hiking and outdoor focused trip to New Zealand.
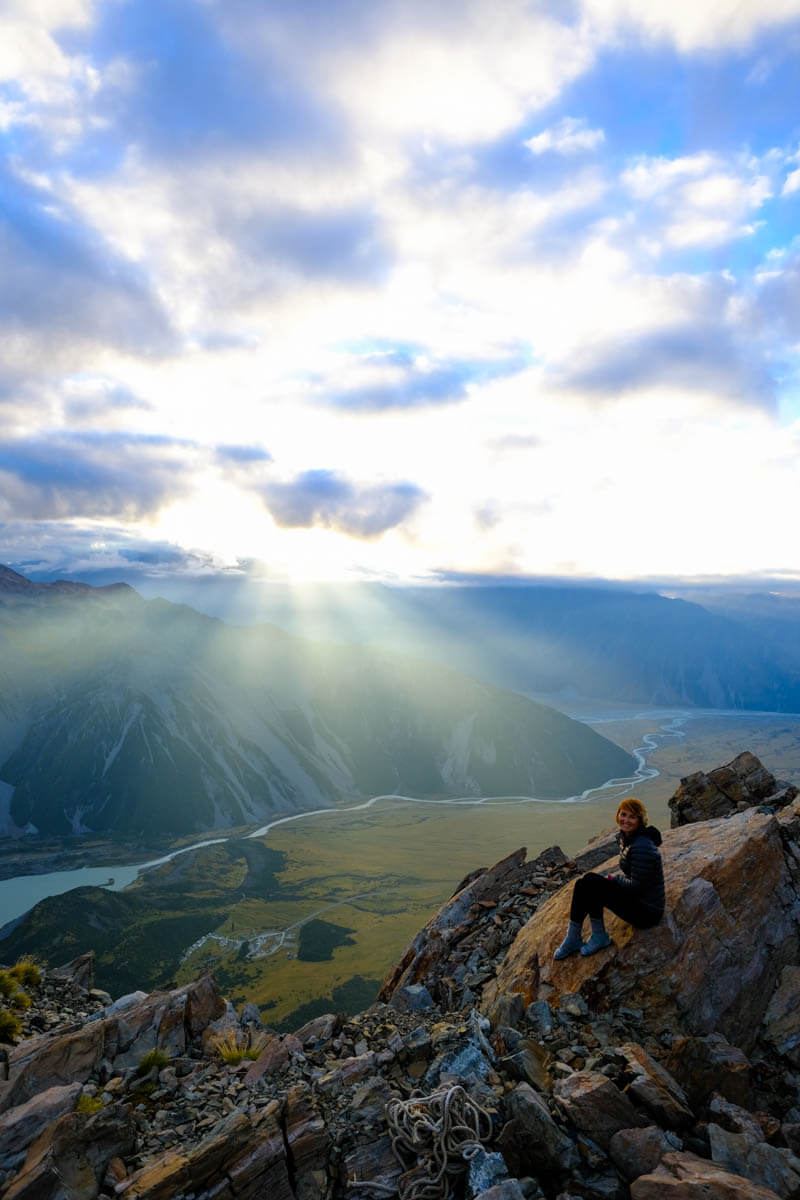
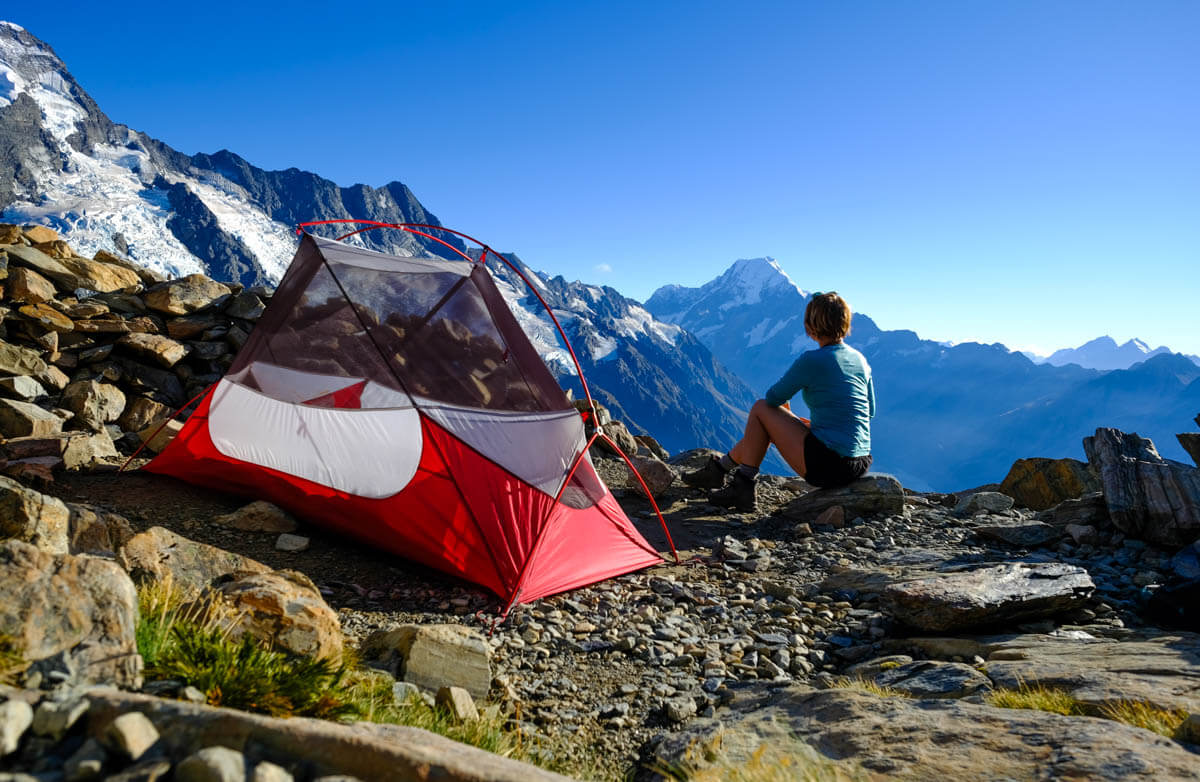
The insanely good views from my camp spot at sunrise after camping alongside the Mueller Hut.
This post contains affiliate links, which means that if you follow a link for a product or service and make a purchase, I receive a small payment at no extra cost to you. I only recommend products or services that I have used, trust and would honestly recommend to my readers. Building affiliate links into my site will help keep my blog going and continue to allow me to produce the content that I hope you are all enjoying reading.
Best Hikes in Aoraki / Mount Cook National Park
- Mueller Hut (overnight)
- Mueller Hut / Sealy Tarns (day hike)
- Hooker Valley Track
- Tasman Glacier and Blue Lakes Track
- Ball Hut Route
1. Mueller Hut (Overnight)
Distance: 10.4km return and 1,100m in elevation gain
Time: 2 Days – overnight
Difficulty: Medium – Hard (Due to the steep and constant incline with overnight pack)
Warning: Complete exposure to the elements — be prepared!
The overnight hike up to Mueller Hut is hands down my favourite hike in the Mount Cook National Park. It is also ranked, in my mind, as one of the most impressive in all of New Zealand. While it is quite a steep and strenuous hike to the top, you are surrounded by incredible views the entire way up, with the final reward extremely worth the pain of ascending 1,100m in altitude in just 5km.
I took way too many photos while in the Mount Cook National Park, but can you blame me?
You have the option to stay in the Mueller Hut once you reach the top, or take your tent with you and camp alongside the hut next to the ridge line. If you want to stay at the hut you will need to book this through the DOC website beforehand. This hike is quite popular during the peak of Summer so make sure you lock in your dates before you get there.
Camping is a lot more flexible, and while you need to report to the DOC office in the valley before you head out, you should have no issues confirming your camp spot. As you can see from the following video, the morning views straight outside my tent door while up on the ridge were absolutely breath taking. It was totally worth lugging my tent up the mountain!
1. Hike to Sealy Tarns from Hooker Valley
The first section of the hike will take you up to Sealy Tarns from the Hooker Valley car park and campground. This section is quite steep and consists of hundreds of wilderness steps. It can be quite tough on your knees — and your lungs so take your time.
Once you reach the Sealy Tarns viewpoint you can take a second to have some lunch and bask in the gorgeous views. From here you can then either return hike back to the car park or continue on further to the Mueller Glacier and Mueller Hut.
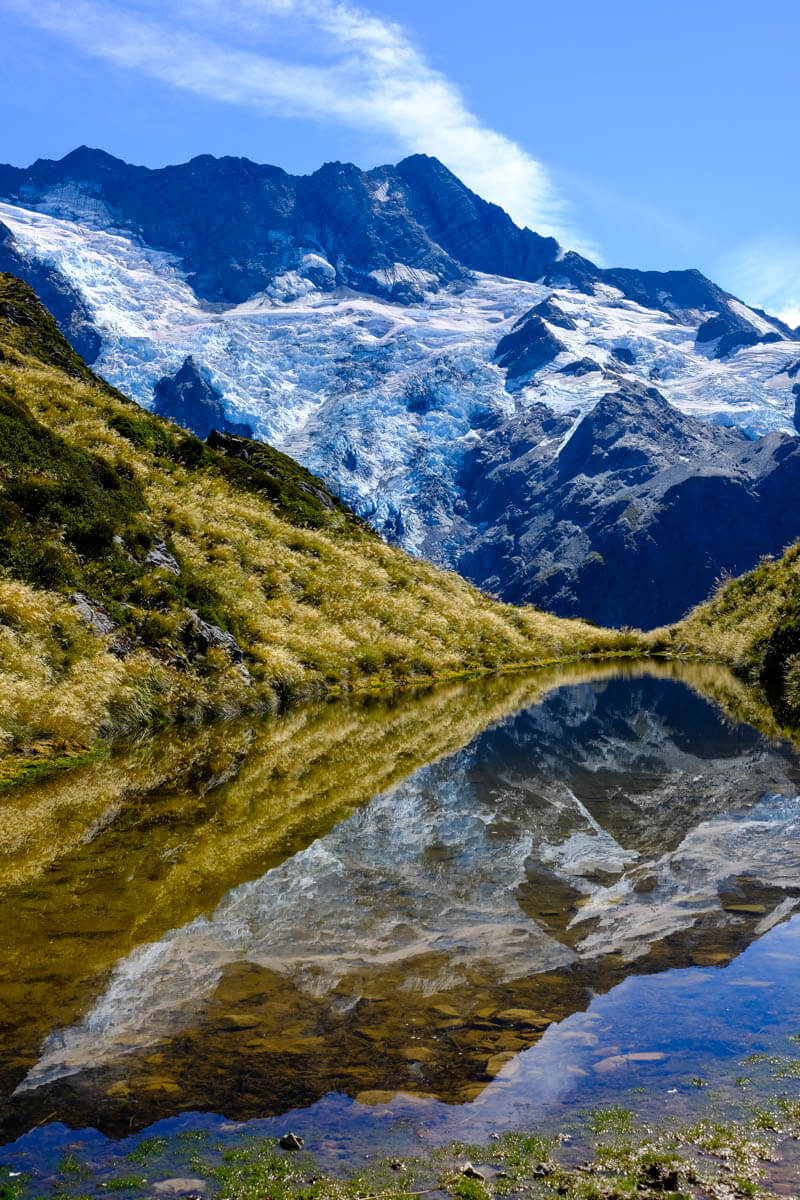
This stunning shot was captured on the way up to the Mueller Hut at Sealy Tarns, Mount Cook National Park.
2. Hike to the Mueller Glacier Viewpoint from Sealy Tarns
Once you go past Sealy Tarns there are no longer steps and the trail now requires scrambling up loose scree and rocks. This section is a little easier on your lungs, but is a bit more technical and requires a little more concentration. Take a moment on your way up to stop and relish in the views looking back towards the valley and Mount Cook — it just gets better and better the higher you go.
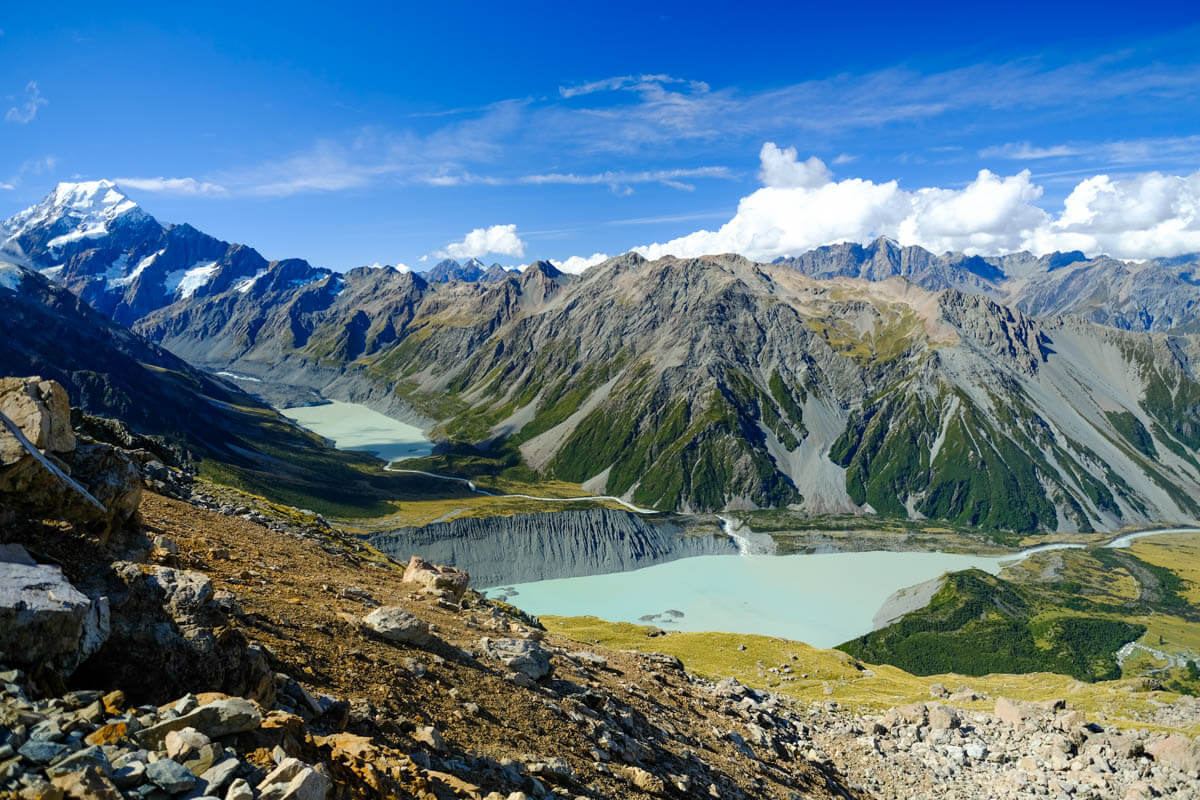
Eventually you will hike up over the last rocky section and loose scree to find yourself at the top of the ridge line. Here you will be surrounded by the glorious Mueller Glacier, and if you are lucky enough, can witness a few avalanches on the glacier while you take a break and enjoy the scenery. Don’t forget to rock hop your way over to the right to take in the rest of the glacier and an incredible view of Mount Cook before you continue on.
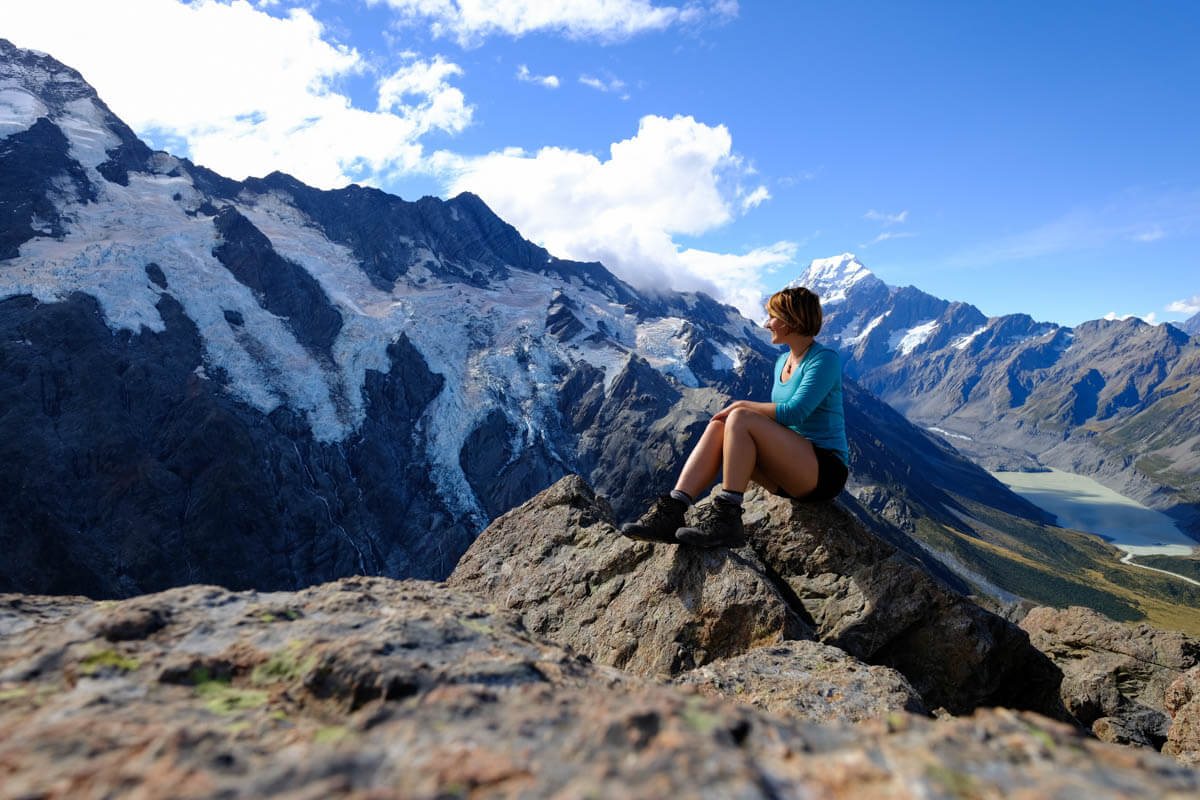
This shot was taken over to the right hand side of the viewpoint to the Mueller Glacier.
3. Hike to the Mueller Hut from Mueller Glacier Viewpoint
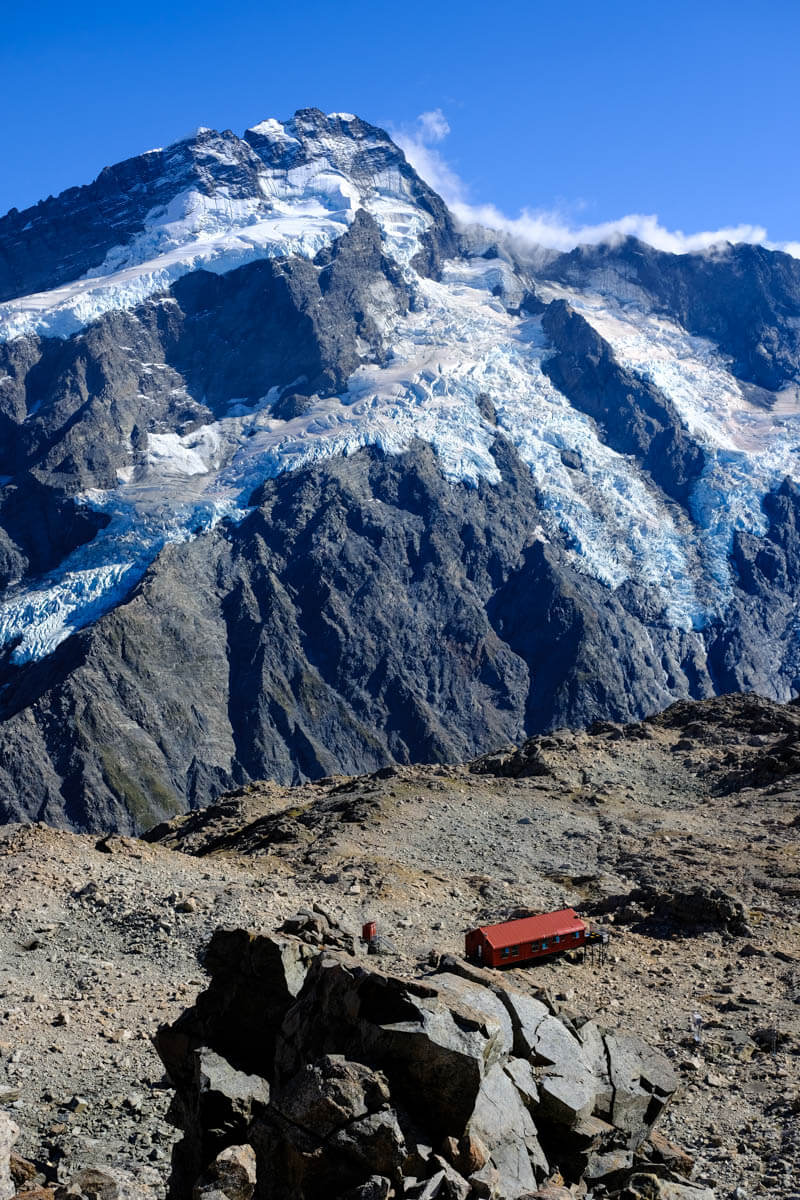
From the view point you are only about 15 to 20 minutes away from the Mueller Hut. This section has barely any incline compared to what you have already done and is mainly just hiking across the ridge along the rocks. Eventually you will come around the last bend and see the red speck of the hut in the distance. You are on the home straight!
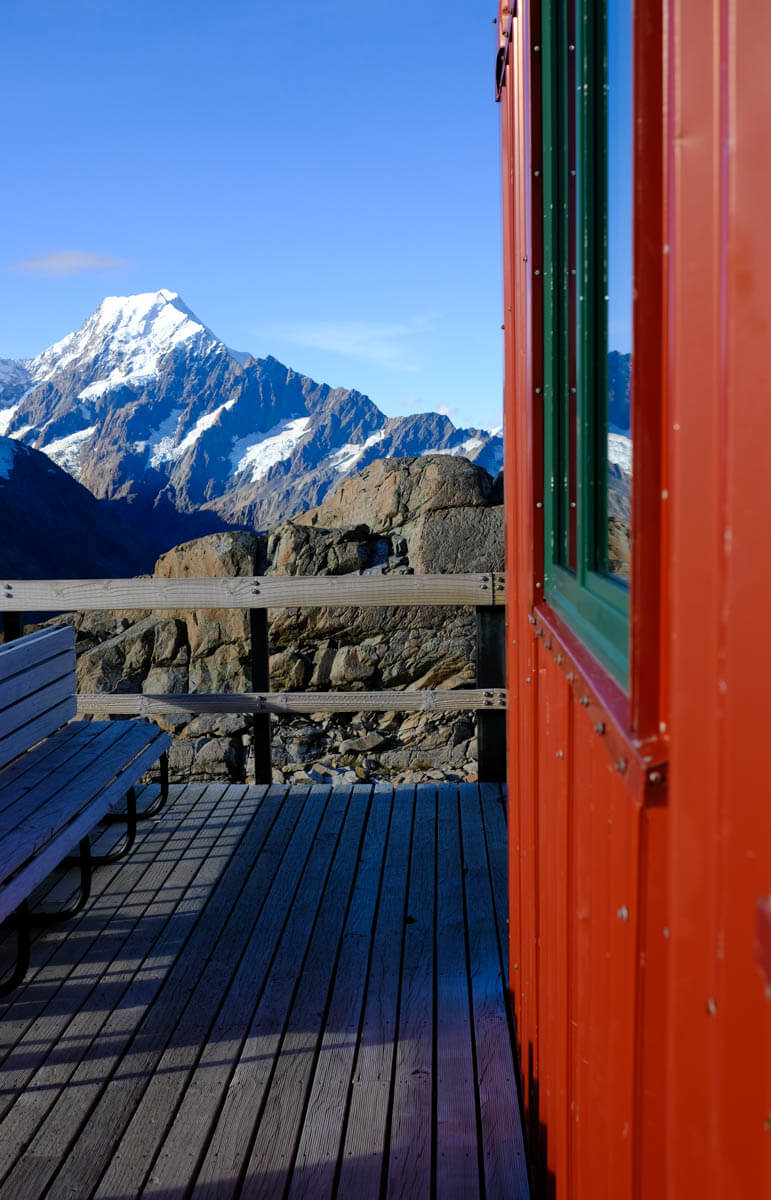
Pretty epic views right outside the hut doorstep!!
Once you reach the hut will be completely blown away by the views — in every direction! It is hard to describe how beautiful this spot really is. If you decided to bring your tent up with you then head over behind the hut, towards the edge of the ridge and the valley. You will find quite a few flat and sheltered spots right near the edge from previous campers. I ended up spending most of my time here by my tent with other hikers basking in the glory of it all.
Whether you opt for the hut or camping, you won’t be disappointed!
4. Hike to Mount Ollivier from the Hut or Camp site
Once you have checked in with the Hut Warden or set up your camp site you can then head up Mount Ollivier to obtain an even grander view of the hut, the glacier, the valley and Mount Cook. It is entirely scrambling and should only take about 15 to 20 minutes each way.
It is a gorgeous spot to spend some time relaxing at if you are up there around dawn or dusk, so don’t worry if you don’t have enough energy to do it on Day 1, you can always do it the following morning before your descent.
This photo was taken from the ridge line on Mount Ollivier, looking back towards the Mueller Hut and the enormous Mueller Glacier!
2. Sealy Tarns / Mueller Hut (Day Hike)
Distance: 10.6km return and 1,100m in elevation gain
Time: 8 – 10 hours return
Difficulty: Medium (Due to the steep and constant incline)
Warning: Complete exposure to the elements – be prepared!
If you can’t afford the time to stay or camp up at Mueller Hut overnight, but you still want to take in the spectacular views of Mount Cook, Hooker Valley and the Mueller glacier then you can complete the return hike in one day. It means that you will be doing quite a significant gain and loss all in one day, but you will have the benefit of carrying far less weight which will make the incline a lot easier. Follow the hiking guide above for the Mueller Hut and turn around at either Sealy Tarns, or Mueller Hut depending on how much time you have available and your fitness levels.
The incredible view on the way up from Sealy Tarns to the Mueller Hut.
Always remember that this area is alpine terrain and weather, so you need to ensure you have sufficient time with daylight to make it up and back and that you are prepared for all weather scenarios no matter how sunny it looks when you start your hike.
3. Hooker Valley Track
Distance: 10km return
Time: 3 hours return
Difficulty: Easy – very accessible (Flat and smooth for most of the way)
This is one of the most famous day hikes in all of New Zealand and is frequently seen on Instagram and in advertising for travel in New Zealand. It is a very accessible trail that allows people from all fitness levels to be able to take in the stunning beauty of Mount Cook and the surrounding ridge lines, glaciers, lakes and rivers.
It can easily be completed on the same day as other hikes in the area as well which allows you to maximise your time in the Mount Cook National Park. As the trail is flat for almost the entire of the trail, it is also possible to complete this hike for sunrise and sunset without concern. Be sure to take the appropriate gear including a headlamp, layers for all possible weather, and devices for emergency contact if you are planning on hiking in the dark (or really at anytime that you hike in New Zealand).
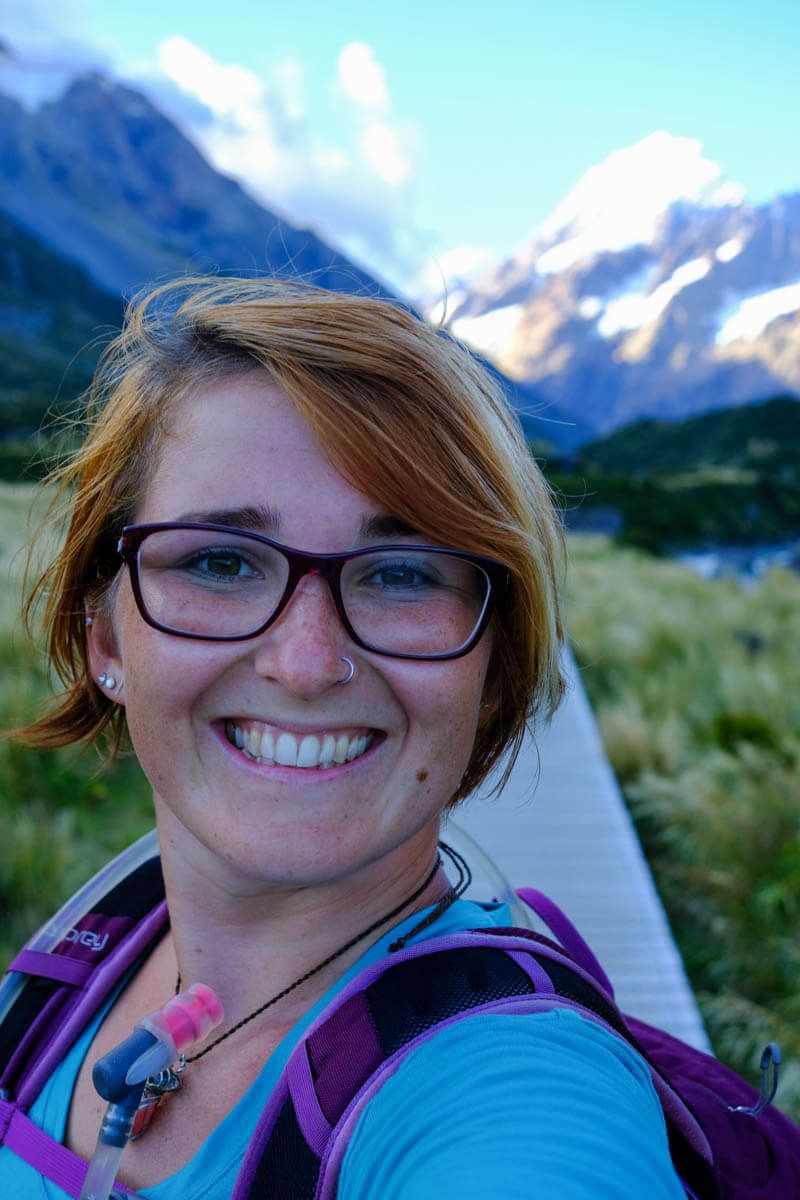
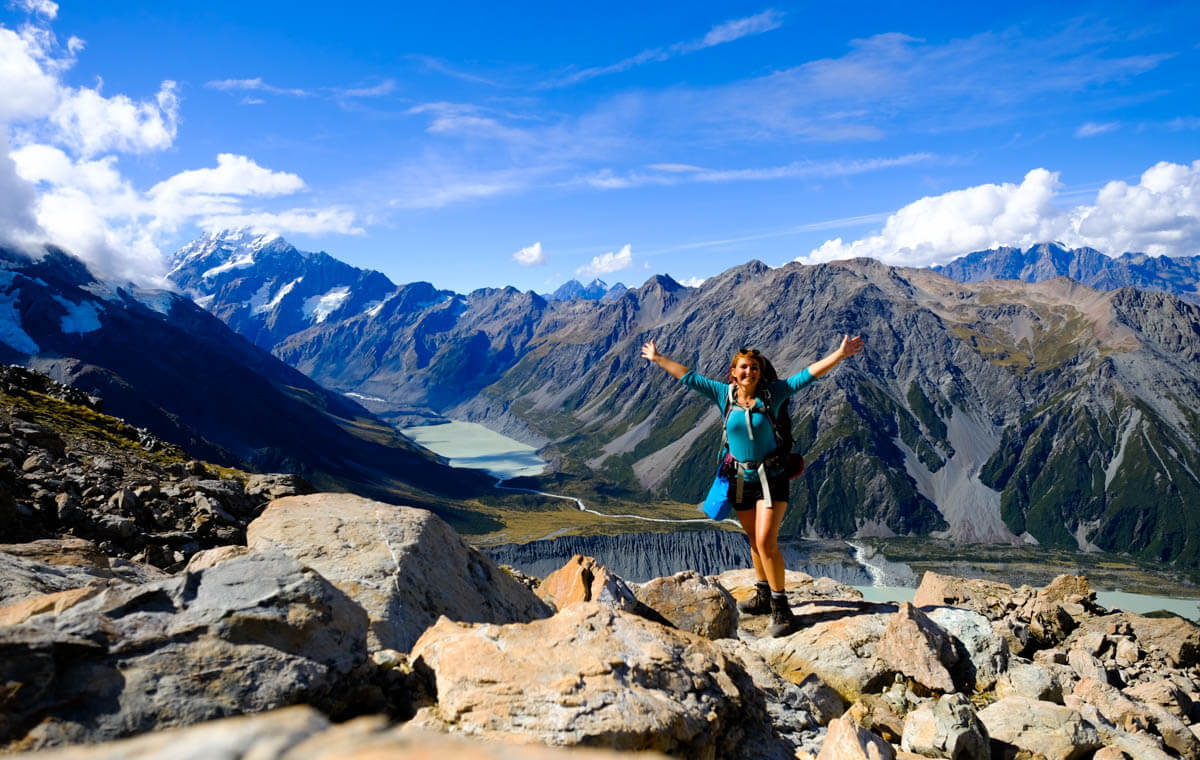
I couldn’t wipe the smile off my face for the entire time I was in the Mount Cook National Park!
4. Tasman Glacier and Blue Lakes Track
Distance: 2.6km return
Time: 40 minutes to 1 hour return
Difficulty: Easy (Gradual incline for a short distance)
This is another fairly easy trail that offers gorgeous views of New Zealand’s longest glacier — the Tasman Glacier. Unlike Mueller Hut and the Hooker Valley Track, this hike does not depart from the Hooker Valley campsite area. On your way out of the valley you will turn left onto another road which takes you into the next valley where you will find a car park to begin the trail.
It is slightly more inclined than the Hooker Valley Track, but would still be considered an easy trail that would be accessible for most people. When you set off on this trail you will have three options and I recommend taking a look at all of them. The path to the Tasman River gives you the best view of the icebergs, and if you rock hop down to the banks of the river you will realise just how big some of the icebergs actually are. I think this was my favourite spot.
The second option is the path that leads to both the Tasman Glacier Viewpoint and the Blue Lakes Viewpoint. If you time it right, the Tasman Glacier Viewpoint could be perfect for sunset or sunrise, especially on a calm day with the snowy peaks reflected in the water.
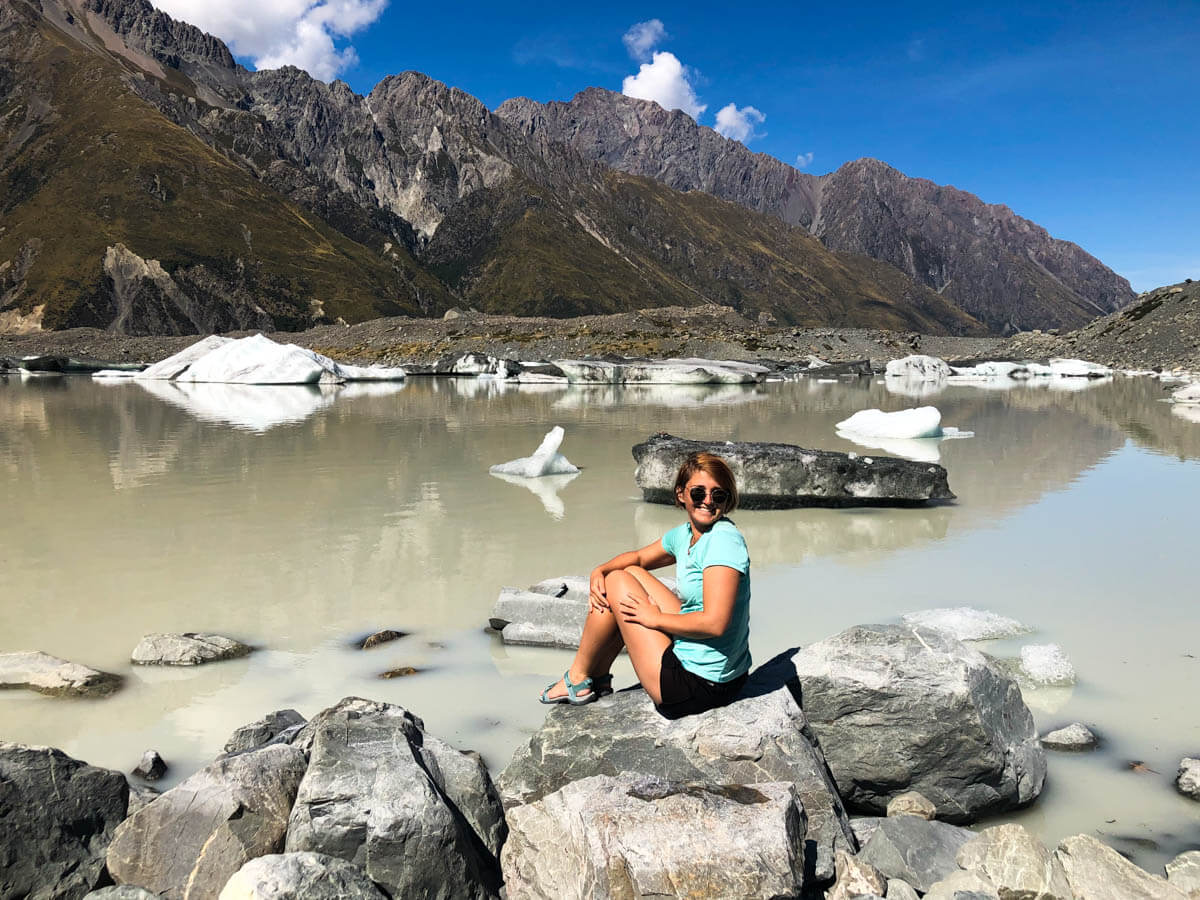
We found a nice little spot to sit and “chill” at while we took in the beauty of the icebergs.
5. Ball Hut Route
Distance: 9km return
Time: 2 Days (overnight), 6 – 8 hours return
Difficulty: Difficult (since the landslides in March 2019)
I didn’t manage to complete this hike on my first time to Mount Cook, but recently went back to attempt Ball Pass. Unfortunately there was still a little too much snow on the pass and I didn’t have crampons with me so was unable to go over. I was able to hike to Ball Hut and back overnight — with the added bonus of having the hut all to myself.
Since the insane storm in March 2019, a lot of the track has been washed away. It is now fairly unstable with constant landslides and DOC have recently closed the track. You can still look at hiking over Ball Pass from the Hooker Valley and then turning around and hiking back if you want to capture the views of the Tasman Glacier.
Getting There and Away
Travelling to and from the Mount Cook National Park is easiest with your own vehicle, but there are still plenty of options to arrive here if you don’t have your own car or van. There are a number of tour companies and tourist buses that take you here as part of a larger tour or single / multi-day trip to the park. This kind of transport will make your time a lot less flexible and can become quite expensive over time but it is definitely still an option if you have no other choice.
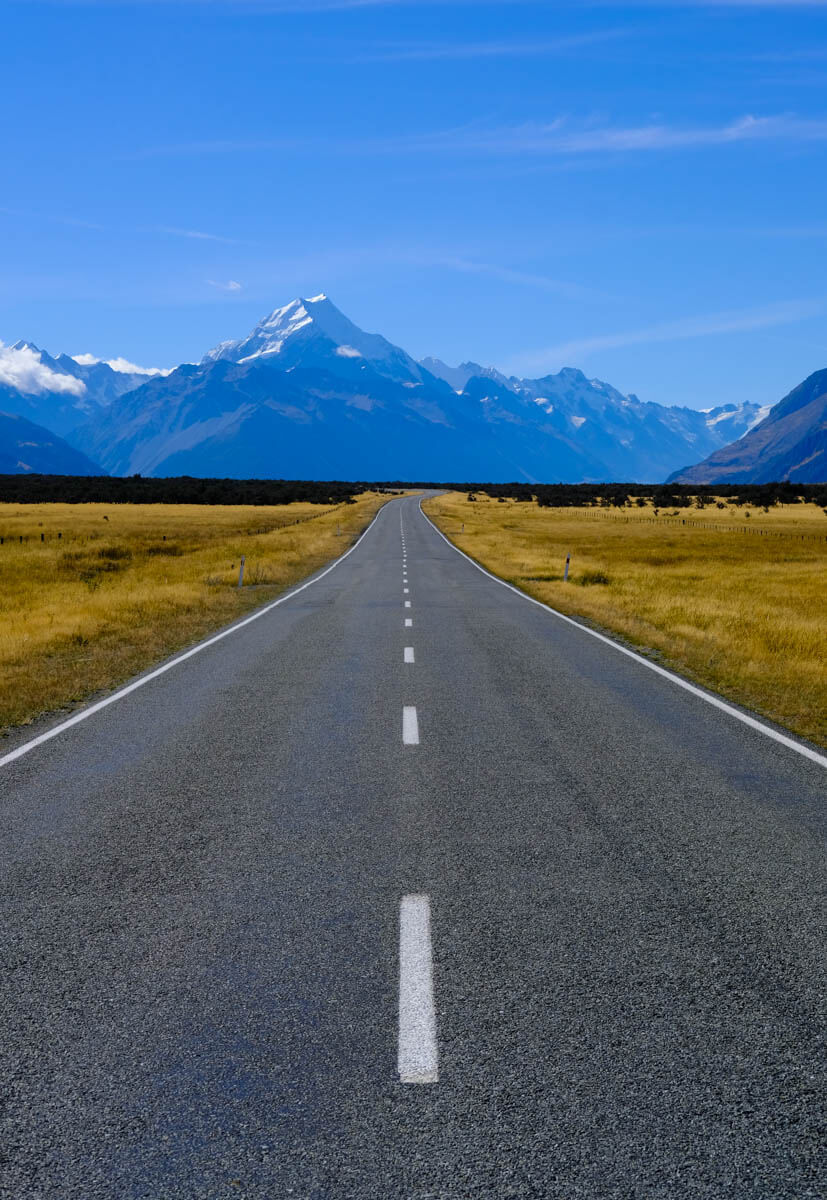
The driving time will fly by with the gorgeous view of Mount Cook in the distance.
You can also try your luck at hitchhiking, which is quite common in New Zealand for backpackers, hikers and tourists. This will obviously be the cheapest option, but you would need to be very flexible with your time in case it takes you longer than expected to reach and leave the park.
Accommodation
There are a range of accomodation options available to you while visiting the Mount Cook National Park. As you approach the valley you will drive along a very enormous, pristine blue lake that has a number of free campsites along it. These are only for people travelling with fully self-contained vehicles and are not intended for anyone travelling in a car with a tent.
As you reach the Hooker Valley there are two options; camping at the DOC site right in the centre of the valley, or staying at one of the many other accomodation options in the small village.
The cheapest option is to stay at the DOC campsite, at just $13.00NZD ($12.45AUD) per night. This camp ground has toilets, running water and an abundance of picnic tables that are all immediately next to the car park and providing camping for car / tent campers and also caravans and camper vans. It is also the starting point for most of the hikes in the area including the Hooker Valley Track and the Mueller Hut / Sealy Tarns hike.
If camping isn’t an option for you then have a look at some of the other options available to you in the Mount Cook Village on Booking.com.
Travel Insurance
No outdoor hiking guide would be complete without travel insurance. While you can take every precaution under the sun to ensure the safety and security of yourself and your belongings, you just never know what is going to happen. That is why I always make sure I have adequate travel insurance before I travel or hike anywhere. For my last three long term adventure trips, my preferred travel insurer has been World Nomads.
If you decide to use them for your next trip or hike and you would like to support this blog, then please make your purchase through the below quote link and I will receive a small commission at no extra cost to you. As always, make sure you read their product disclosure statement and check that it is suitable for your needs before proceeding.
What to Pack
My last piece of advice with regards to hiking in the Mount Cook National Park is what you should pack for any of these treks. If you are only doing a day hike then you really only need snacks, water, and layers for potential weather you may encounter. On an average day hike I usually take the following items;
- 18L Osprey Ultralight Stuff Pack
 or Osprey 20L Tempest day pack
 - Fujifilm X-T2 Camera, a wide angle lens and a general purpose / portrait lens, and accessories
- CamelBak water reservoir / Nalgene water bottle
- Snacks (muesli bars, dried fruit and nut, Clif bars and / or fresh fruit or snacks depending on the length of the hike)
- Water/windproof jacket if the weather turns — this jacket from Arc’teryx is excellent quality, or or a jacket from The North Face
- XT Ultralight Packable Down Jacket or Arc’teryx fleece in case it will be cold at the summit or if completing a sunrise hike
- Headlamp in case you lose light
- Phone for emergencies and maps.me
- First Aid Kit
- Personal Locator Beacon (PLB) — depending on how remote your hike will be, although I always carry one regardless
If you are hoping to tackle one of the multi-day treks listed above then you will need a lot more gear, specifically designed for overnight hiking. I highly recommend heading over and checking out my post about what to pack for multi-day hikes.
That hiking guide provides you with a detailed packing list for clothing, shelter, food and cooking, as well as safety and emergency gear for any multi-day trek. There is a downloadable checklist as well to use the next time you are packing.
Recommended Reads
This is the first of many New Zealand specific hiking posts that I will be publishing from my recent hiking trip to New Zealand. In the meantime, if you want to check out some of my existing hiking related posts they are all on my Adventure Travel area of the blog.
If you have never solo hiked before, but have been considering it for a while then you should definitely have a look at some of my posts relating to solo hiking:
You can also easily access posts about my other favourite hiking destination, Patagonia:
- The 4 Day Trek to Cerro Castillo, on the Carretera Austral in Chile
- Hiking and Camping in Pumálin Park, on the Carretera Austral in Chile
- The Best Hikes in Bariloche, in Northern Patagonia, Argentina
- Adventure Activities and Hiking on the Carretera Austral, Chile
- The Ultimate Guide to Torres Del Paine and The O Circuit, Chile
Save it for Later
If you are headed to New Zealand soon then why not save this guide about the best hikes in Mount Cook National park for later on Pinterest? You can share it to Facebook with friends and family as well. If you have been to the Mount Cook National Park and know of an incredible hike not included here, then please leave it in the comments section below so I can add it to my list for next time. Let me know if you have any questions!
Save this Pin about the Best Hikes in the Mount Cook National Park for later on Pinterest!
–Girl Seeking Purpose